Zapier Integration In MemberPress WordPress
For Zapier Integration In MemberPress WordPress we need a Developer Tools add-on. And developer addons are available with pro plus license. Zapier is a web-oriented tool that helps you to automate your workflow That why it’s worth upgrading to the pro version. Let’s have some features of its important advantages.
- Member press users can automate their workflow and make it much easier to run a membership site
- It allows users to connect various services to generate leads and bring more customers to your website Zapier helps to make a more customized user-based experience without having to write any code.
- Zapier integration will enable you to connect member press to an autoresponder, billing system, which also means that you will be able to get your site up and running much quicker.
- You must have a member press plus or pro subscription and a Zapier account. so that you can connect MemberPress account and enable a fully automated Billing system, CRM Software, and autoresponders.
You may also be interested in FOMO Plugins, Email Services, and Membership Plugin
Let’s move toward Zapier Integration In MemberPress WordPress
Step1 – Installing member press developer tools add on
- Open the dashboard of your WordPress website.
- Then hover over MemberPress and click on the addons page. Now Open the Add-ons page. •
- Now scroll down and you have to install and activate your member developer tool.
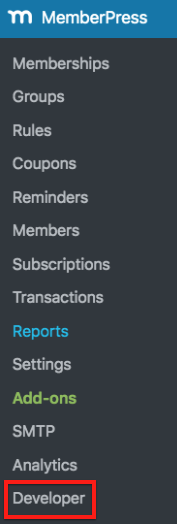
- After activating your developer tool you will see that a new option named as a developer has been added to your Memberpress menu
Steps 2– Connecting Zapier to memberPress
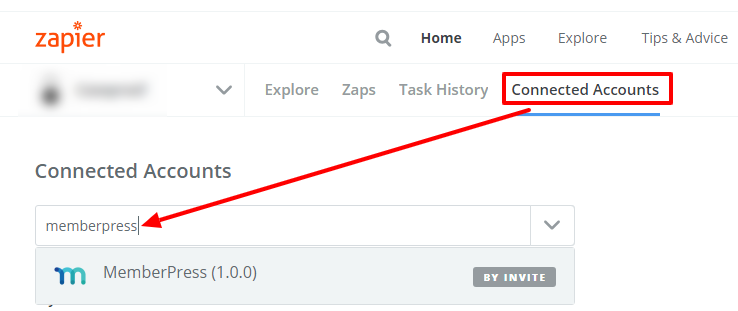
- Open zapier.com and log in to your account and open connected accounts in it.
- Search for memberpress then click on it
- When you open memberpress you will see that new windows will popup in front of you.
- This new window will ask you the API key and website URL
Note- if your website is located in a subdirectory then u will have to include a subdirectory in the URL site. You need to enter a website link Including HTTPS:// or HTTP://. And we always recommend you to use an SSL certificate means HTTPS for a secure connection.
Now move on back to your website dashboard API Key – Hover over the MemberPress menu then click on the developed option and then REST API page. Copy and paste the API and paste into the page.
Now click on the yes button then Zapier will connect to the member press once it gets verified
Let’s Create our First Zap With MemberPress Plugins
For Example – Let’s consider we are going to give free membership for our website new email subscribers using mail chimp
Step 1 – Create new zap and select mail chimp
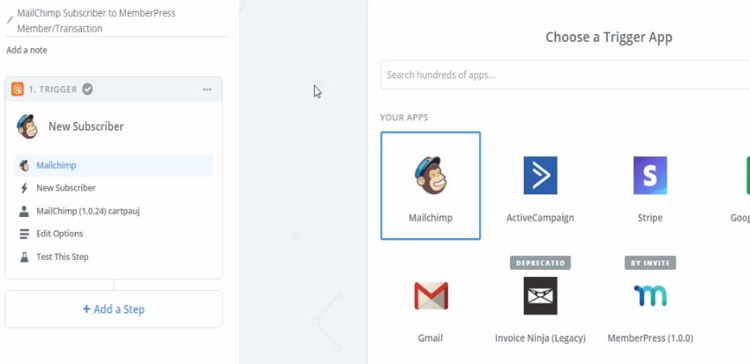
Then select a new subscriber then pull out the all-new subscriber list from the website.
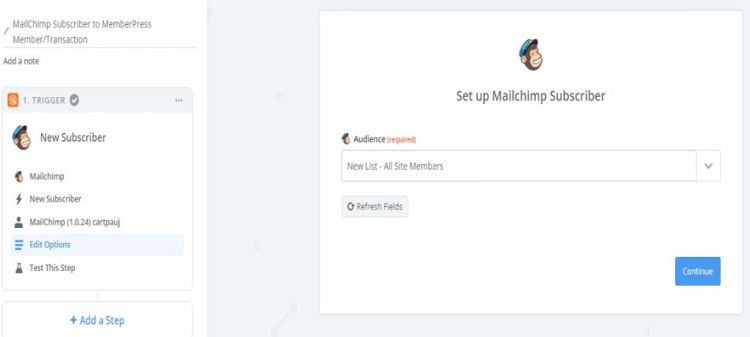
After that click continues to connect.
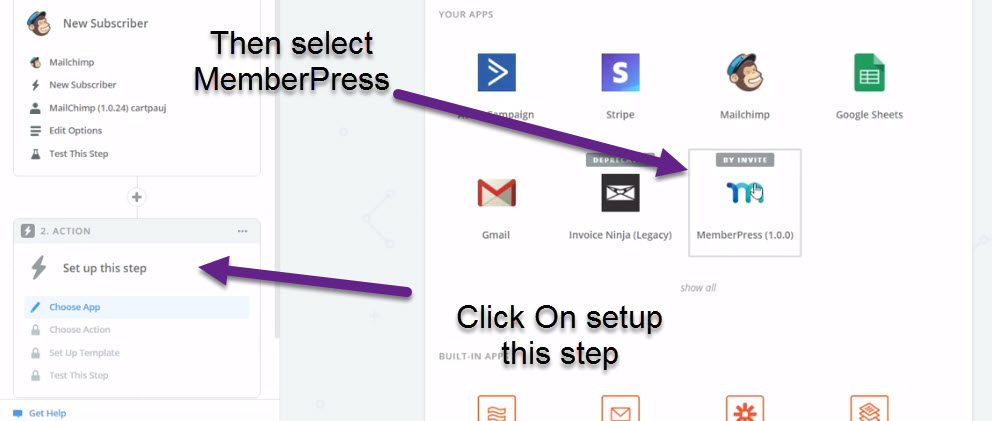
Then your step will be to find a member then select your member list. Once you are searched for a member using their username or email list.
Step 2 – Now we are going to create a filter rule Which means this zap will once follow the specific rule.
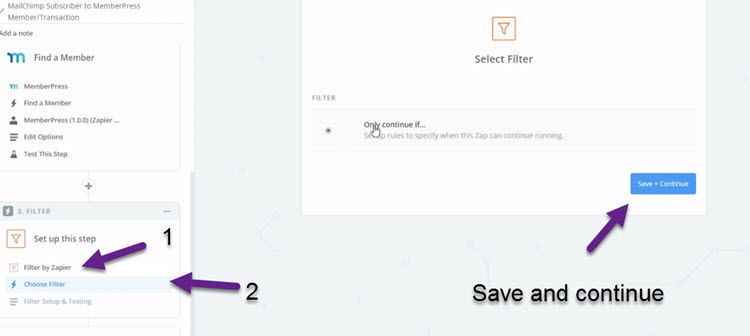
The Next Step is To create a filter rule by select selecting the email and rule. Once you are done click continue and save.
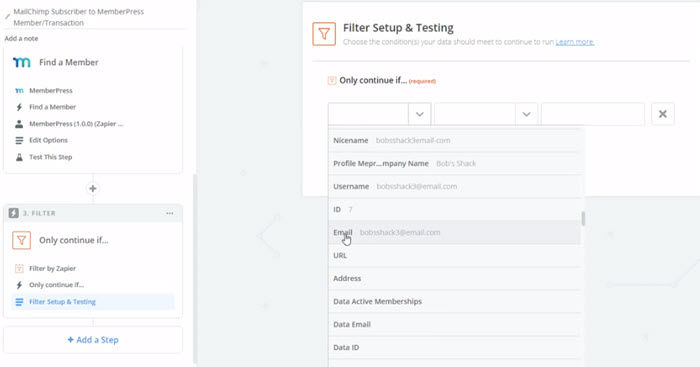
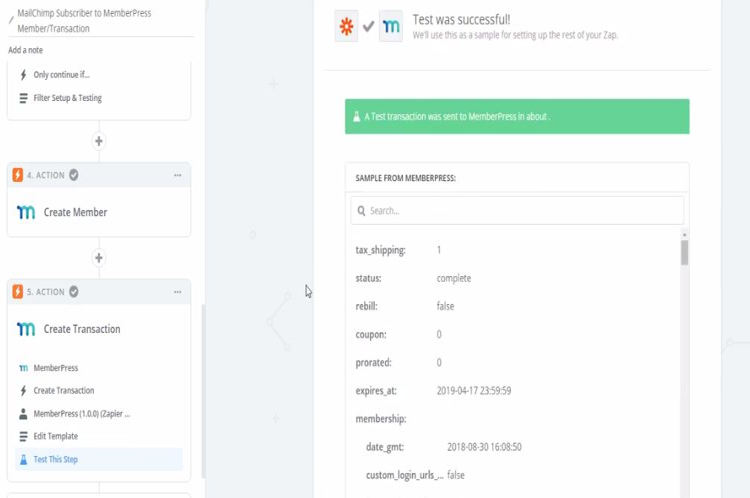
Step 3 – We are going to create action for that we need to select the email list or subscriber email then edit the template. Then test the sample once you are done save it.
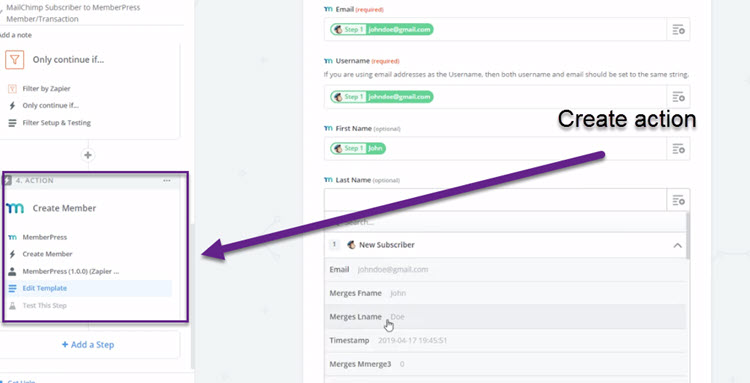
After the test, You will get test successful
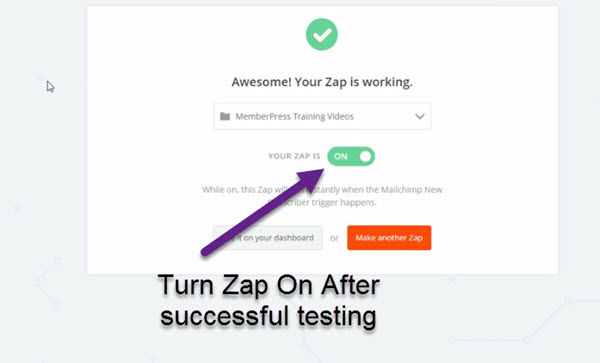
Step 4 – Turn on zap to automate the process after successful testing.
Now Goto memberpress WordPress dashboard menu and click on transaction.
Conclusion – MemberPress with zipper can do magic so in our suggestion it’s worth upgrading to Plus or Pro plans

