Set Up WordPress Email Logs In 5 Simple Steps
Set Up WordPress Email Logs In 5 Simple Steps to keep a track of all the emails that are sent out from your website. You can do it with the help of the WP Mail SMTP plugin for WordPress. Setting up email logging will help you keep a record of all the emails that are useful in the following cases:
- When you’re using Form Notifications – You get email alerts every time, someone fills the form. This will help you manage your leads and send emails to the correct team members.
- When you need more details, check more details like the date and time when the email was sent.
- To ensure emails are delivered- It helps you ensure that the emails are delivered. In case a visitor says, they didn’t receive the email, you can also rely upon the records.
- When you want to check who got which email- You can check which visitors or team members got which email.
Table of Content
- WP Mail SMTP
- Steps to Set Up Email Logging
- Installing WP Mail SMTP
- Email Logs Enabling
- Viewing the Email Logs
- Conclusion
WP Mail SMTP

It is one of the most popular WordPress SMTP and PHP Mailer Plugin. It helps you fix all the issues with the email deliveries.
Features
-
- Email Logging- The plugin helps you keep a track of every email that you send from your website.
- White-Glove Setup- You don’t have to worry about setting up the WP Mail SMTP plugin. The experts and the support team help you set up and configure the plugin.
- Send emails with your favorite SMTP provider- It allows you to send the emails through the most secure and best SMTP providers.
- Manage Notifications- You can control and manage which email notifications you want to send from your WordPress website.
- Prevent your emails from being marked as spam- It helps you deliver your emails directly to your visitor’s inbox and bypass the spam folder.
Steps to Set Up Email Logging
Settings to email logging on your WordPress site are not a hard nut to crack. You just have to follow these simple steps to get started:
1. Installing WP Mail SMTP
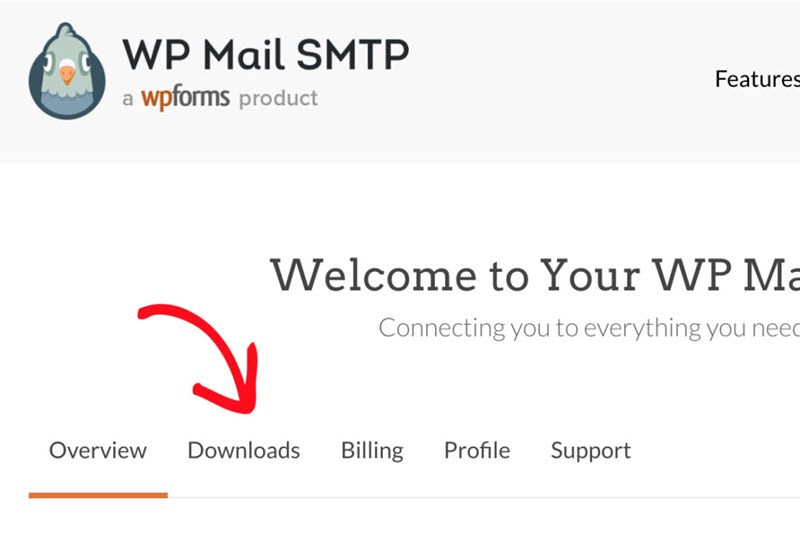
The very first step is to install and activate the WP Mail SMTP. To begin, log in to your WP Mail SMTP account and go to the Downloads tab.
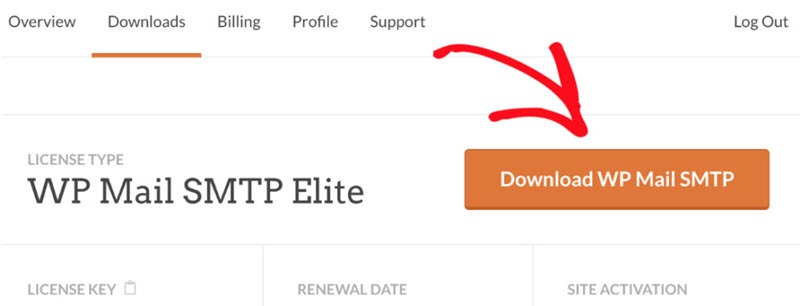
Thereafter, click on the Download WP Mail SMTP button and a zipped file of the plugin will be saved to your system.
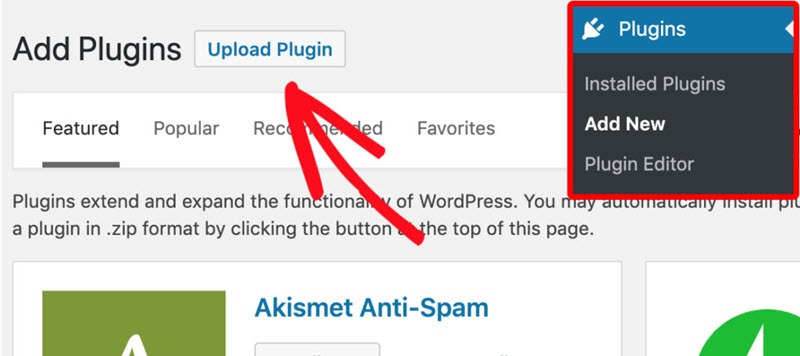
Thereafter, go to your WordPress dashboard, go to plugins and click on “Add new plugins”. Then, click on the “Upload Plugin” button and then click on the Choose File button. Now, upload the zipped file of the WP Mail SMTP plugin.
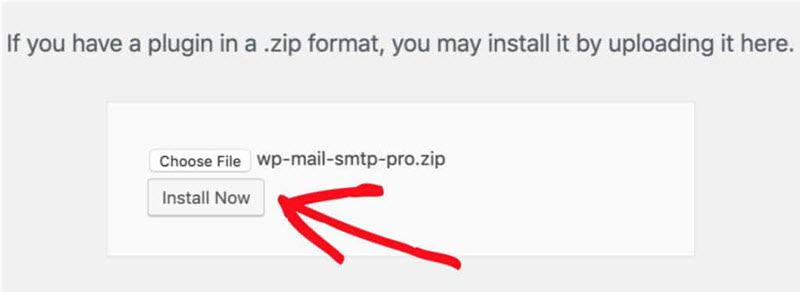
After uploading the plugin, click on the Install Now button.
Thereafter, you have to activate the plugin. To do so, click on the Activate Plugin button.

Finally, verify your license key and you’re all set to go. To assess your license key, go to your WP Mail SMTP account and click on the Downloads tab. You have to log in and you’ll find your license key on the main page.
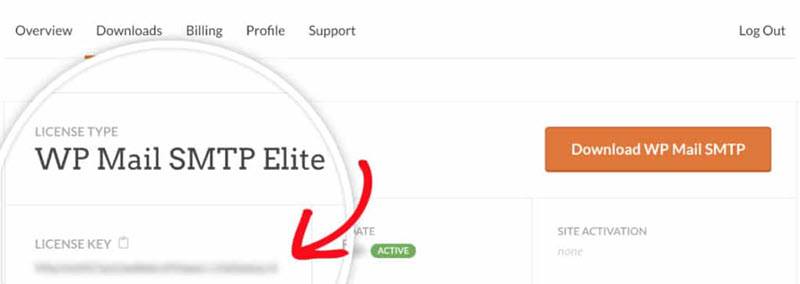
Copy the license key and paste it into the License key field. Click on the Verify Key button and it will add your license.

In case, you don’t want to go through the entire process, you can use the White Glove Setup option i.e., the WP Mail SMTP team will set up and configure the plugin on your behalf. You should note that the White Glove Setup option is available only on the Elite License for WP Mail SMTP. If you already have the Pro License, you can easily upgrade to the Elite License.
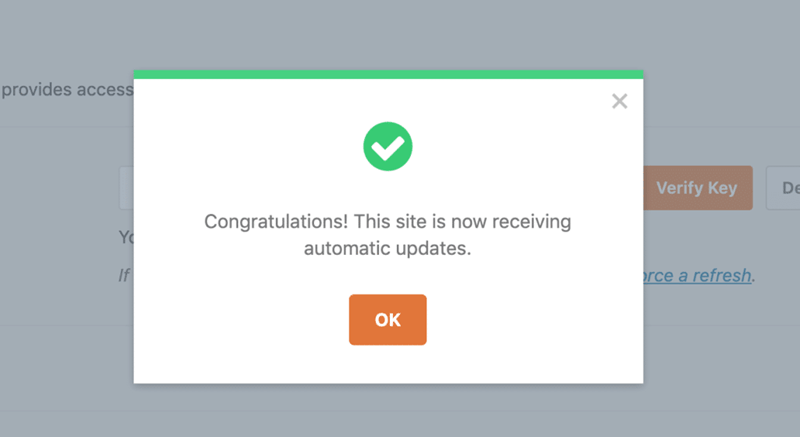
After successfully installing and setting up your plugin, move back to your WordPress dashboard.
2. Email Logs Enabling In WordPress
After activating the plugin, you have to enable the WordPress email logs. To do this, go to the WP Mail SMTP and click on settings. Then, go to the Email Log tab where you’ll find an option labeled Enable Log. By enabling the email log you can keep a record of all the emails your website sends.
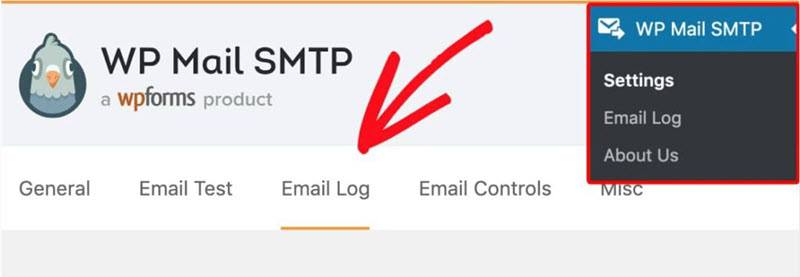
The enable log option will also help you keep a track of the following:
- Status of the emails (whether sent or not)
- The subject of the emails
- The time and date of the email
- Email Address of the recipients
- Attachments (if any)
- Technical details such as MIME, Content type, and more
- The mailer was used.
You have to check the box labeled ” Enable log”. You’ll see another option labeled as “Log Email Content” underneath as you check the box.
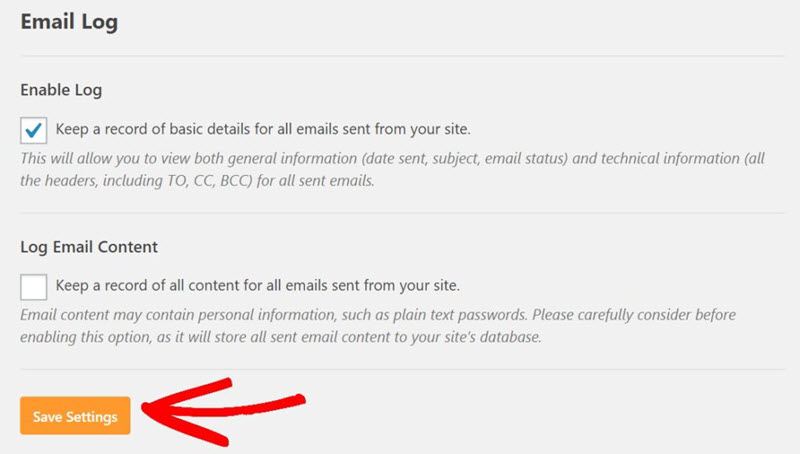
Checking this box “Log email content” will store the content of all your emails that you’ll find in the email record. The email content will be saved as plain text. However, this step is completely optional. If you have a large site, this option may add trouble by increasing the size of your database. In that case, you need to be careful.
Once done, save the changes and move ahead.
3. Viewing the Email Logs
After setting up the email log, you can view it. To do this, go to WP mail SMTP and click on Email Logs. There you can see your email logs. The newest emails will be shown at the top.
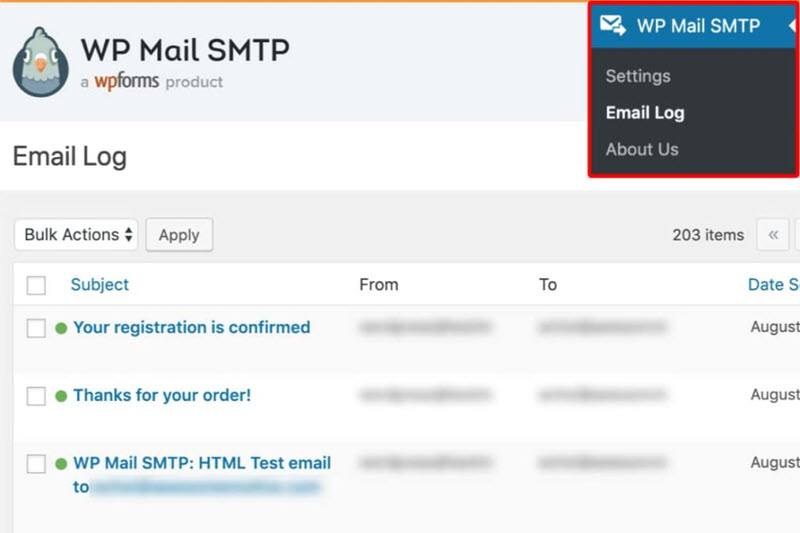
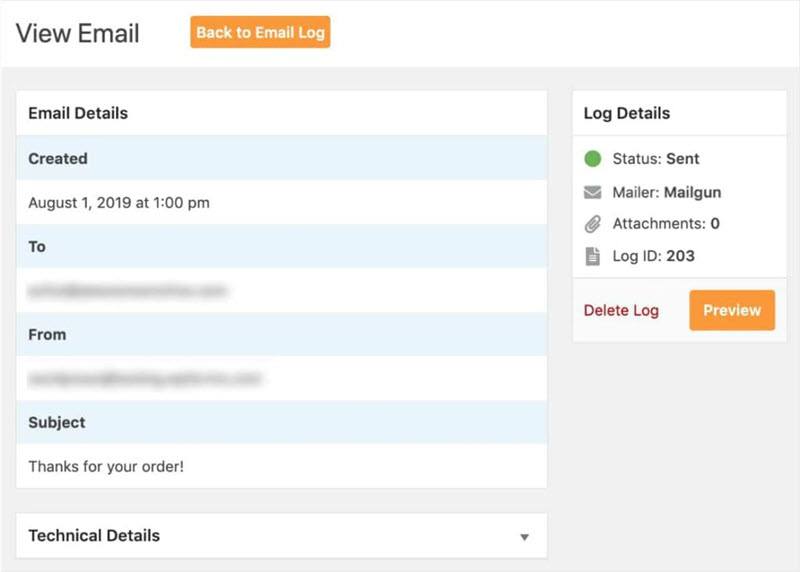
You can view the details of the individual emails by clicking on the subject of the email.
Conclusion
That’s all about this blog. In this post, we have seen how to set up the WordPress email logs using the WP mail SMTP plugin for WordPress. We hope that you liked the blog. In case, you have any queries, feel free to leave them in the comments section below. We ap[preciate your response.
You may also be interested in Live chat plugins, Best email marketing service, and Page Builder Plugin



Great post! Concise and informative. Loved the step-by-step guide on setting up WordPress email logs. However, it would have been even better if you mentioned the popular Postman SMTP plugin. Keep up the good work!