How to Create a Multi-Step Form in WordPress
Let’s learn how you can easily create a Multi-Step Form in WordPress Within a Few Clicks. A Multi-Step form is basically a form that is split into multiple pages. This is generally used so as to make your form look more organized and presentable. This way it is even convenient for the user, as well. Before we get into the process of it, let’s see why should we use it, in the first place.
We are already well aware of the fact of how a lengthy form could be irritating for the users. So to avoid that situation, you could always break down your form into different pages which would make it convenient for the users to fill. Forms are not only limited to Contact forms you can create a registration form, Billing forms
Let’s have some features of using the multi-step form
It also helps in increasing your site’s form conversion rate. With the help of such firms, it makes the choosing capacity of the users easy and simple.
The Multi-Step form makes it easy for users to fill the form, so there will be fewer chances of abandonment.
Breaking down the information into areas of focus will keep the users engaged and you can simply collect the needful information with the help of the conditional field.
These are the benefits that you, as well as the users, will gain, with the help of a Multi-Step form. Now, let’s move forward to the most significant part, that is, the steps to create a Multi – Form in WordPress.
You may also be interested in Fomo Plugins, Lead generation Plugins, and Page Builder Plugins
Let’s learn Step by step to create a multi-step form in WordPress.
WPForms is the best and convenient drag and drops WordPress form builder plugin which is quite easy for beginners to use. You can create any kind of contact form registration, form donation form, or payment form. You can also call Wpforms as multi-functional contact form plugins that’s why we recommend Wpforms as the best plugin for Multi-Step Form in WordPress
Step 1: To create a new form in WordPress The first step you need to do is install and activate the WPForms plugin Pro license because Multi-page Forms addons are supported by Wpforms Pro license. Then, go to WPForms forms dashboard where you’ll find the ‘Add New’ button, which will help you create a new form and a number of templates will be available.
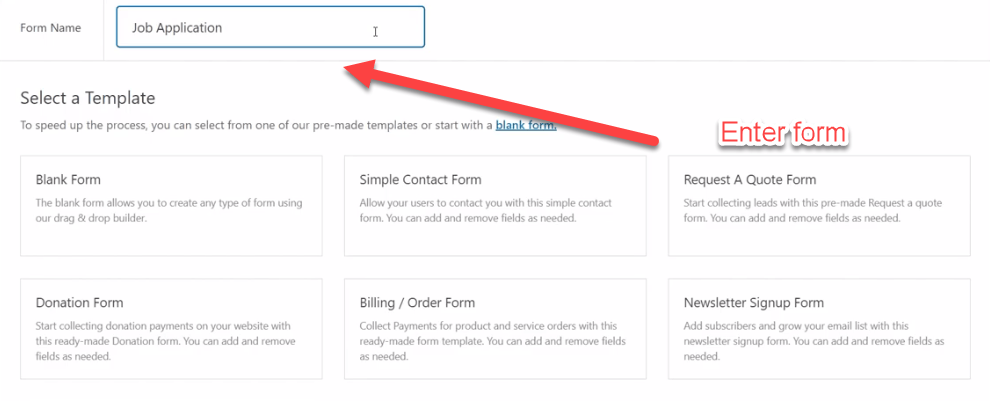
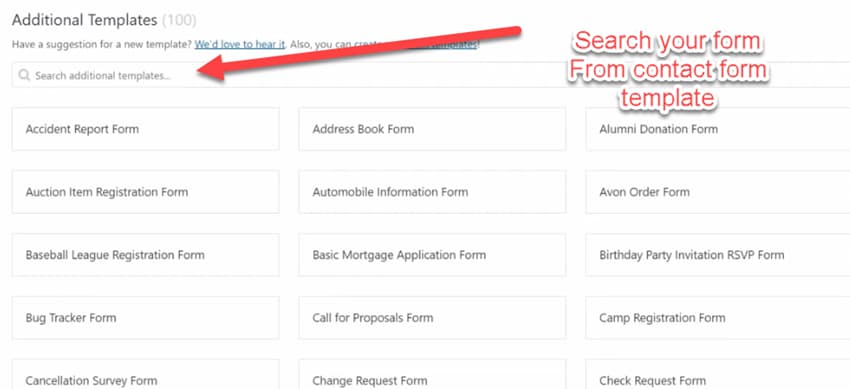
Step 2: They have a premade template to ease your work. Let’s say if you want to create a job application form, Then you can search the form which suits Your contact form design. Or you can build from scratch you can write that on the form name and can just select the template matching with a need or you can build from scratch. Now, you’ll need to type the name of your form.
Steps3: Now You will redirect to Wpfroms drag and drop form builder. There you can pick the required field option from the left menu and drop it on the right menu. You can add any field up to an unlimited number of times. If you want to make any changes to any added field you can click on any of the form fields To edit the levels and options. You can also rearrange the order with the help of the form field.
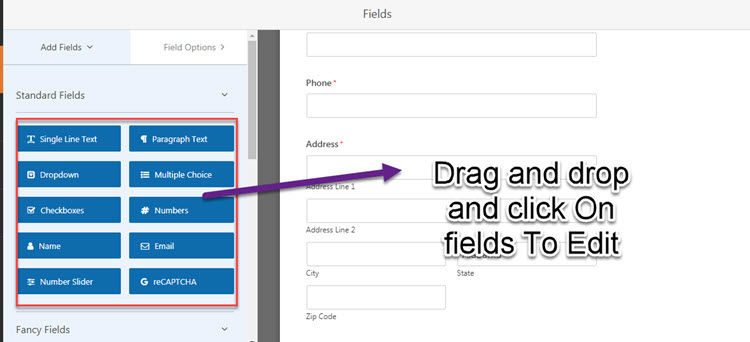
Note – There are various other pre-designed templates available if you want to create a form with different templates like a simple contact form, user registration form, order form, survey, and so on.
Step 4: Split the form into multiple
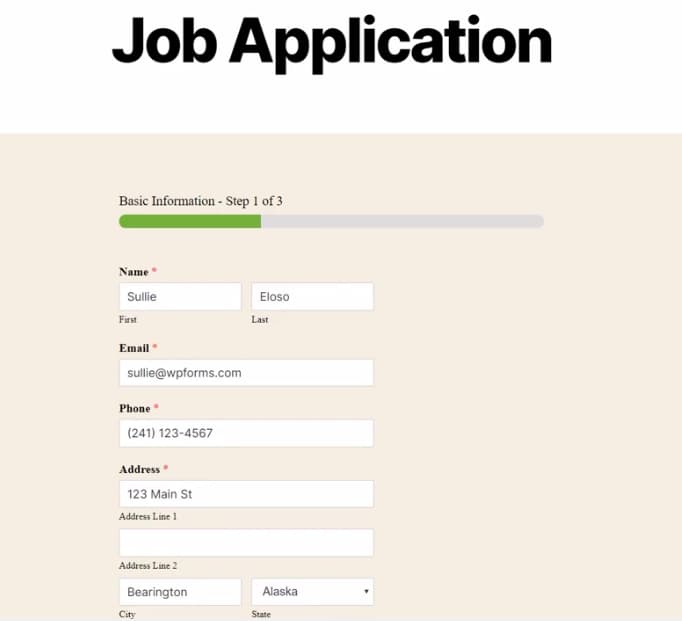
I hope you till this part you know could have learned about creating forms. Now it’s time to splitting Forms into 2-3 pages. So that your website visitor clicks next to check forms content on another page. This can be done by dragging the Page Break form field to the right-hand side form which is placed under fancy fields.
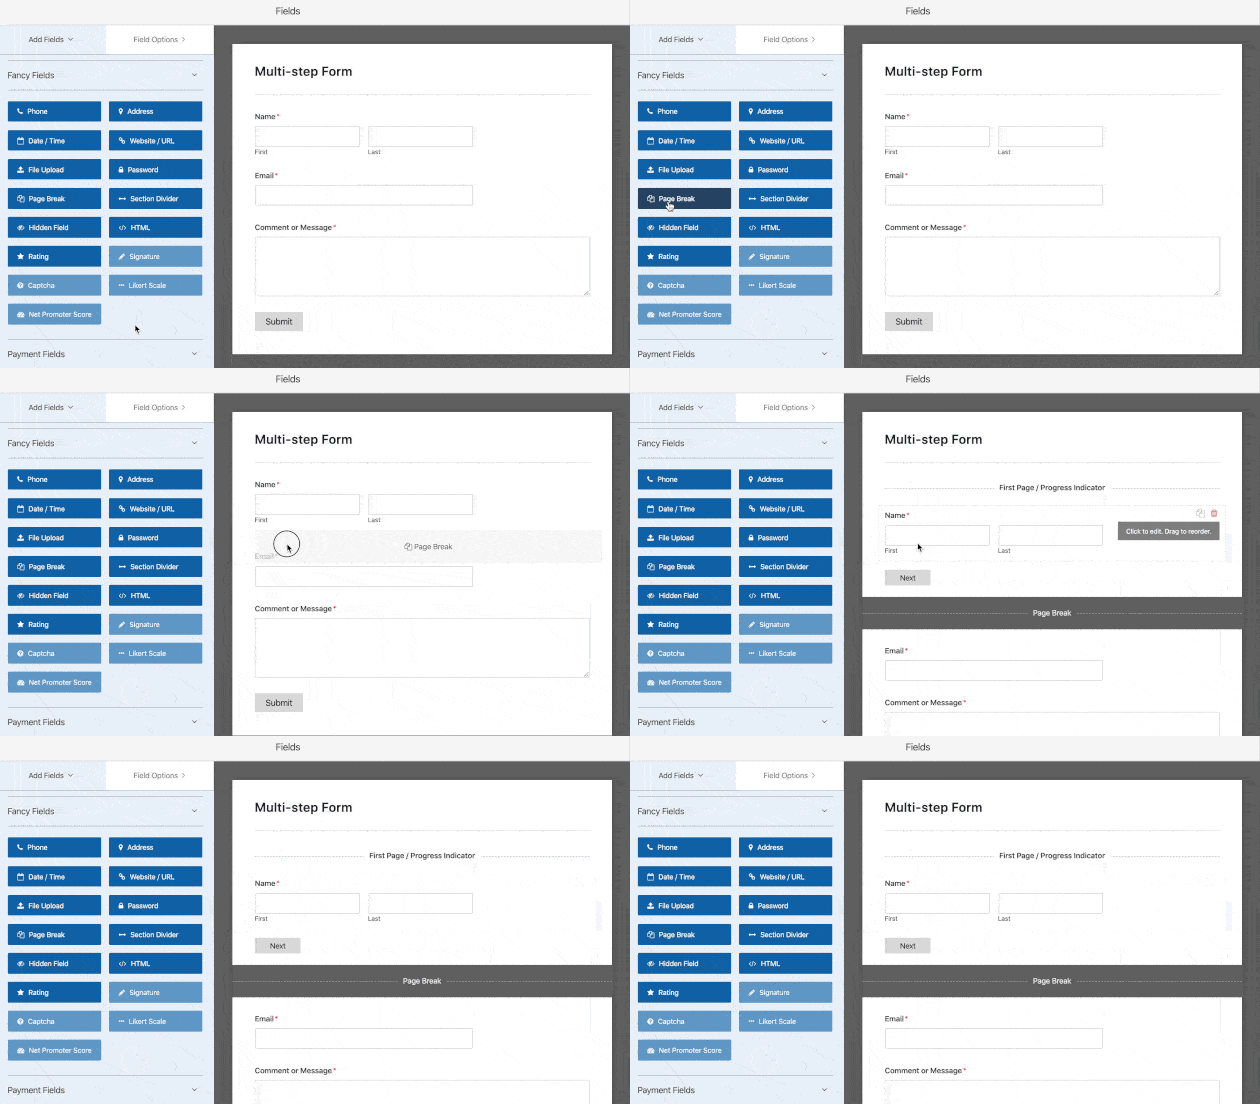
You can repeat this step wherever you want to split your form into a different page. But it’s important to remember that you don’t flood your users with too much information as WPForm allows you to add as many forms as you want, so don’t get too much carried away.
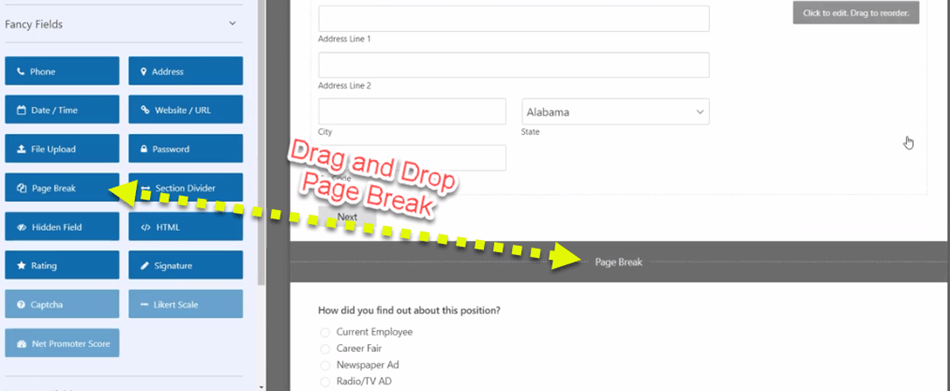
Step 5: Customization of the form progress bar
A forms Progress bar tells you exactly how much percentage of the form you have filled. It acts as a visual indicator and tells the users how much of the form is left to complete.
It comes with 3 different Breadcrumbs options In your multi forms progress indicator bars:
Circles: Its show circle with the number of steps and page title
Connectors: They display the connect connecting bar and the title of the page on Form
Progress Bar: When the user fills the form progress bar indicator moves and also shows the remaining bars.
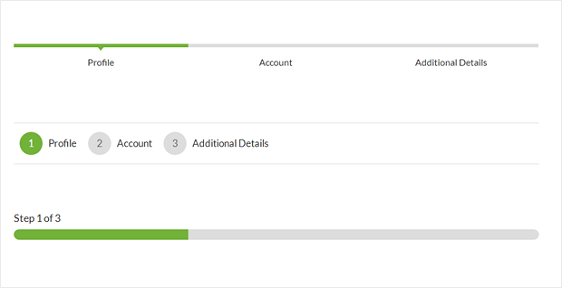
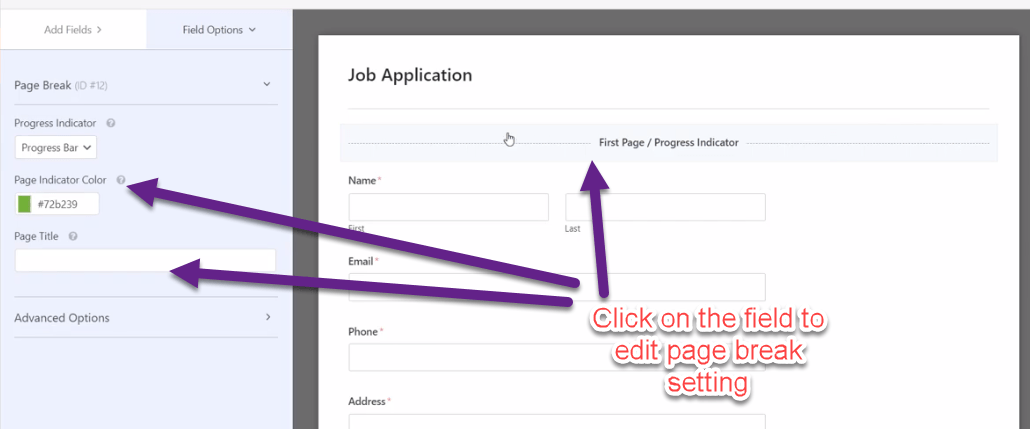
Now you need to click on Page break Field In Order to customize the Page title and Progress bar.
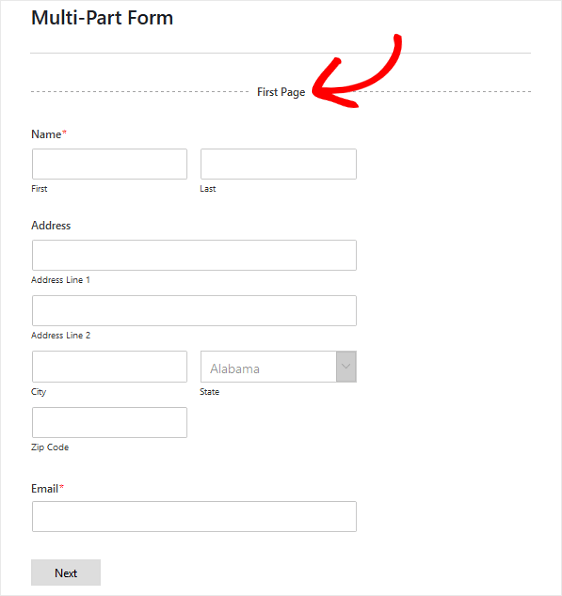
You can choose the progress type from the new panel. Also, you have the option to change the color to highlight the indicator, if you want to. By choosing circles or connectors, you’ll be able to change the page title too, which will help the users to know the page number, they are on.
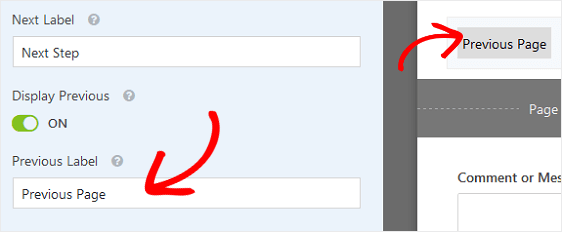
You can also alter the Next Page button and text. For this, you can just click on the Page Break section and turn on the display Previous ON toggle. This will enable the users to visit the previous page, in case they forget to add any information. After you are done altering your progress bar, you can just click on ‘save ‘.
 Step 6: Setting up Email configuration.
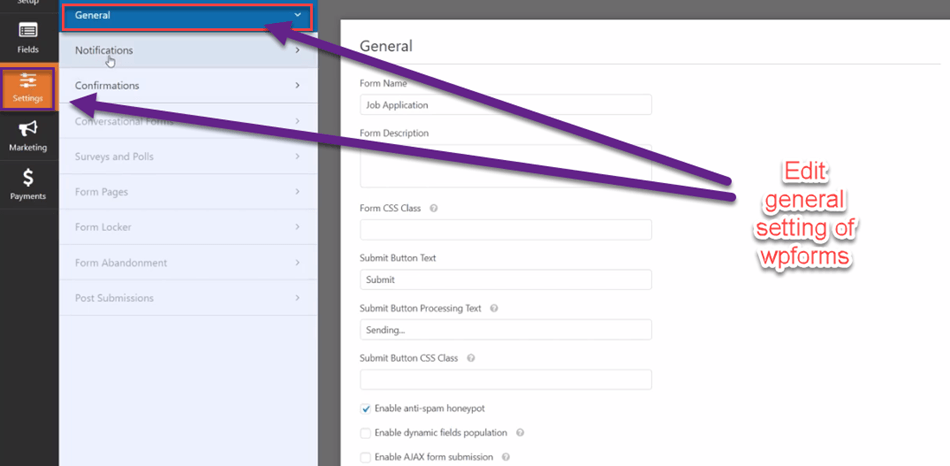
- General Configuration: Now, go to settings and click on the General button. From here, you can change Form name, Form Description, Submit Button Text, and submit button CSS class.
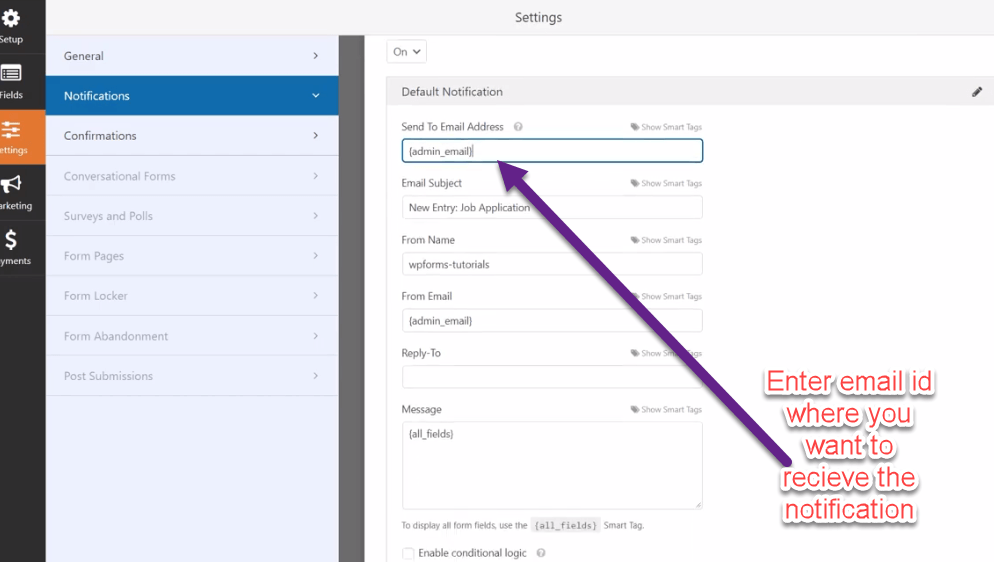
- Notification Setting: Now, click on the notification which is again under the settings option. To receive the notification on your email id you need to turn on the notification tab first. Then enter send to email id Who is going to receive email notification about all form submission. You can also select smart tags
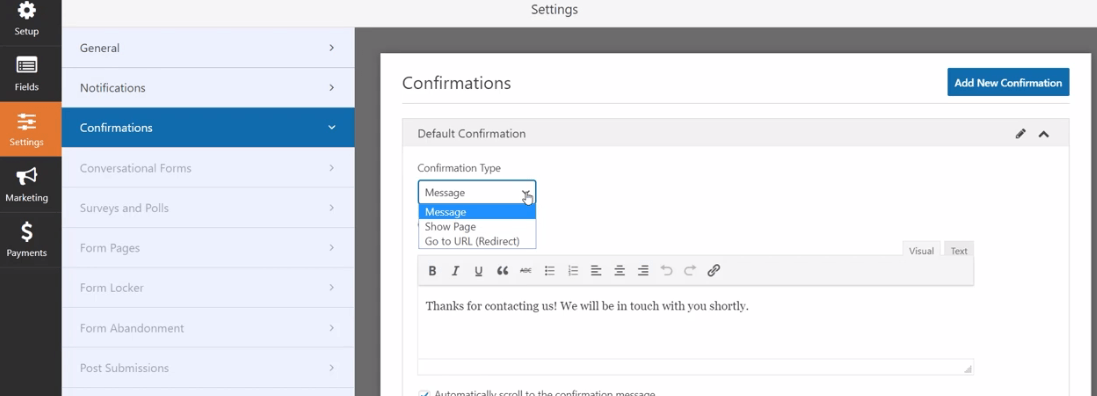
- Confirmation setting: This helps the customer to acknowledge the fact that their form has been processed and successfully send to the reviewer. Once you click on the confirmation tab, you can choose between Message, Show Page, and Go to URL (Redirect). if you click on this option, a simple message of confirmation will appear, once the users have submitted their form, to let them know that the form has been processed. Or you can add your custom message.
Step 7: Embedding form to your website
Now, For embedding go to the WordPress Dashboard and Create a new page or select the page where you want to embed the form. Then click on the plus icon to add a new content block. Now type WPForm in the search field to find it easily. Now you will find your Form, just select your form and it will automatically fetch the content from the backend.
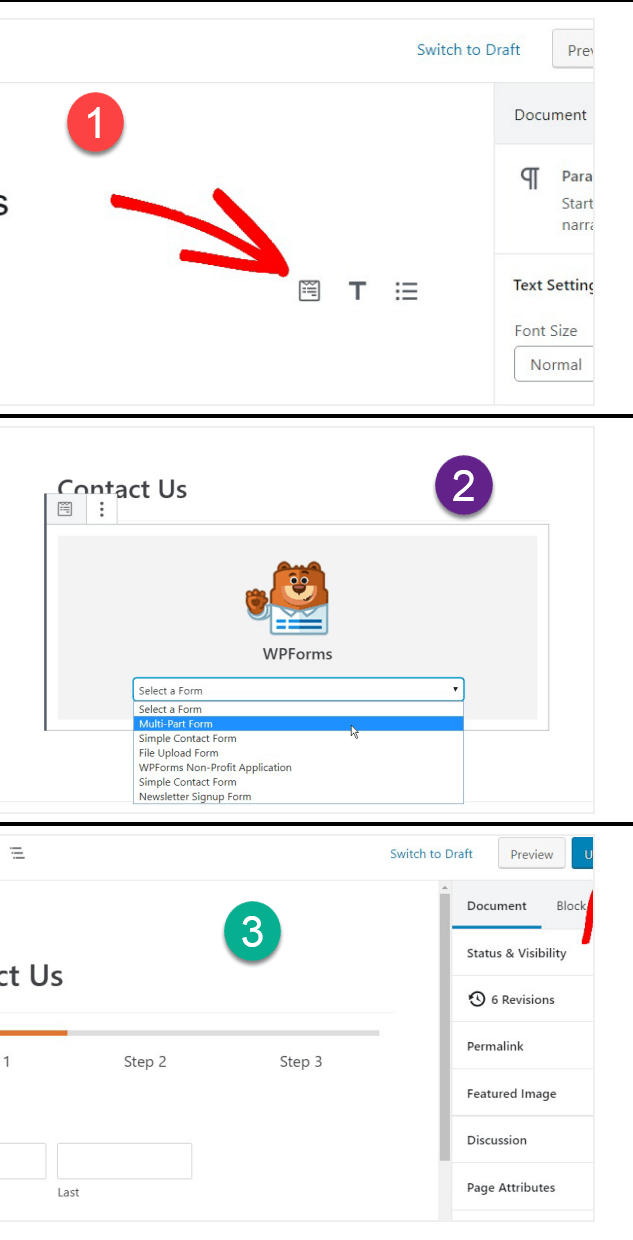
Lastly, to publish your Multi-Step Form in WordPress, click on ‘Publish’ and your form will appear on the website

