Easily Create Mailchimp Subscribe Form in WordPress
MailChimp is a WPForms Addon that enables you to add a signup Mailchimp Subscribe Form in WordPress on any page of your website. Mailchimp Signup form helps you build your email marketing list, attract new customers or boost engagement. You can customize the form however you’d like.
Firstly, Let’s understand what is a Signup Form?
Signup Forms appear directly on your WordPress page which has to be filled by visitors without leaving the site. This helps you collect information about your visitors. You can use this information to build your email marketing list for targeted marketing
In this blog, we will explain the steps involved in creating a MailChimp subscribe form in WordPress. Let’s get started.
- Install And Activate WPForms Plugin
- Activating wpforms MailChimp Addon
- Connect Your Newsletter Signup Form To MailChimp
- Configure The Notifications For Your Subscribe Form
- Configure The Subscription Form Notifications
- Add MailChimp Subscribe Form To Your Site
- Conclusion
Steps To Create a Mailchimp Subscribe Form in WordPress
1. Install And Activate WPForms Plugin
The first step is to install and activate a WPForms pro plugin for your WordPress site. Check out our blog for a step to step guide on how to install and activate the WPForms Pro plugin for your WordPress site.
2. Activating wpforms MailChimp Addon
After installing the WPForms plugin for WordPress, go to WPForms and click on Addons. Search for the MailChimp Addon and install it. After installing and activating the MailChimp Addon, you will see a green-colored Active status on your screen.

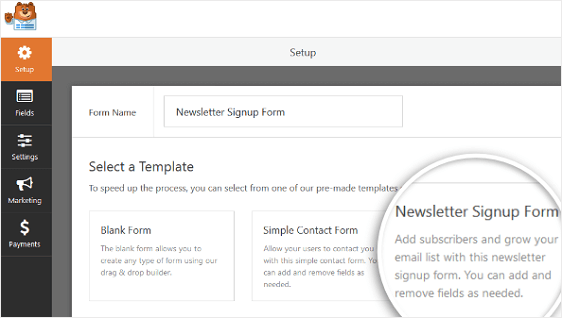
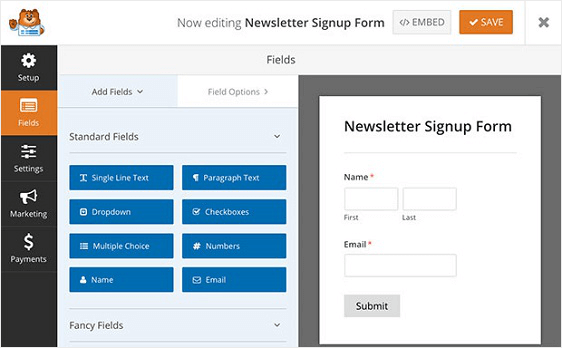
After activating the addon, you have to create a new form. To do this, go to WPForms and click on Add New button. Now name your form and select the Newsletter Signup Form template on the setup screen. This way, WPForms will create a Newsletter Signup Form for your online business.
Newsletter signup forms ask the visitors to add their email address and hit subscribe in order to receive recent updates about your business through email.
Now, go to the Fields Section, to customize the fields in your signup form. Here, you can add additional fields in your Newsletter signup form by the simple Drag and Drop method. To customize the field, click on it and rearrange it in the order of your MailChimp subscribe form.
GDPR Agreement field is a crucial field that helps you to create GDPR compliant forms. This enables you to store the personal information of your visitors and use them for email marketing purposes.
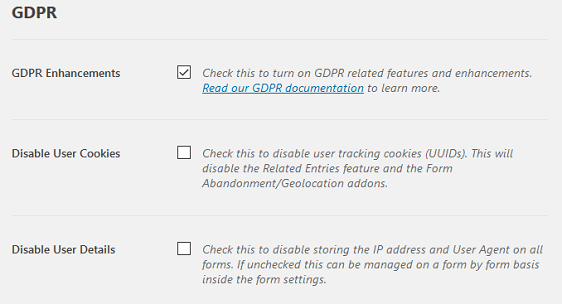
To do this, first, add the GDPR Agreement field to your Mailchimp signup form. If you want to change the default language of the GDPR Form field, click on the form field and make the necessary changes. To use the GDPR form field, go to WPForms and click on the settings tab. Now check the GDPR Enhancements checkbox. This feature would allow you to enable the GDPR enhancement features, disable user details, including IP addresses and User Agent data, disable user cookies, and access the GDPR form field for your WordPress forms. Ensure to save the changes.
3. Connect Your Newsletter Signup Form To MailChimp
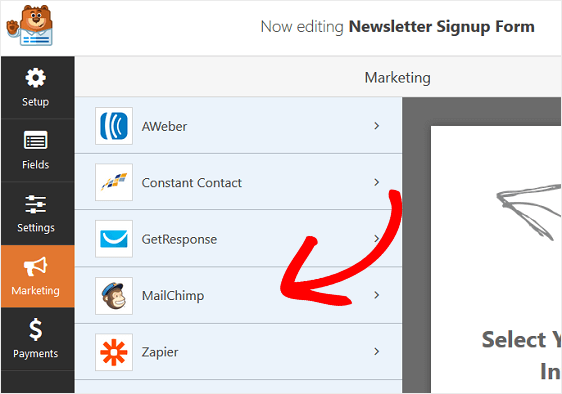
Now, you have to configure the MailChimp settings in order to connect your Newsletter Signup Form to MailChimp. To do this, go to the Marketing section and click on MailChimp.
Now, click on the Add New Connection Button.
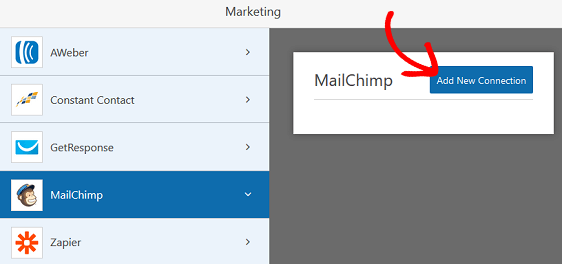
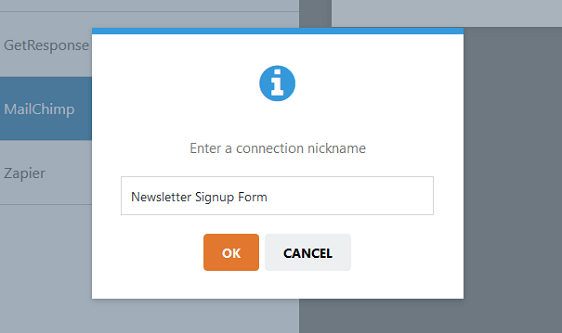
Now, you will see a pop-up box on your screen. Enter a name for the connection in the box and click on the OK button.
On the next screen, you have to enter your MailChimp API Key. To get the API key, sign in to your MailChimp account and go to the Your Profile section.
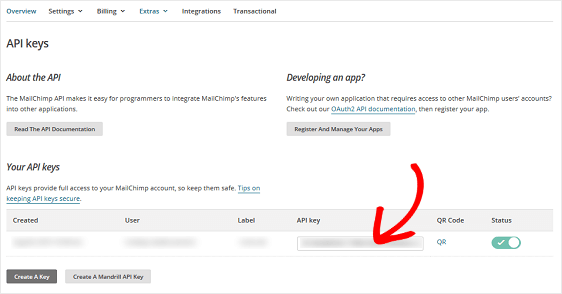
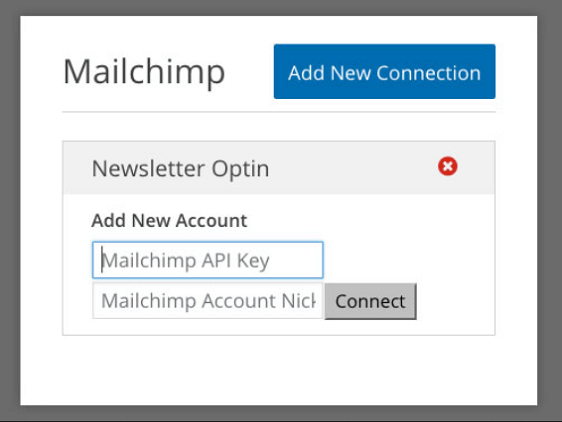
Copy your API key and paste it into MailChimp’s Add New Account field. Now, click on the Connect button to confirm it.
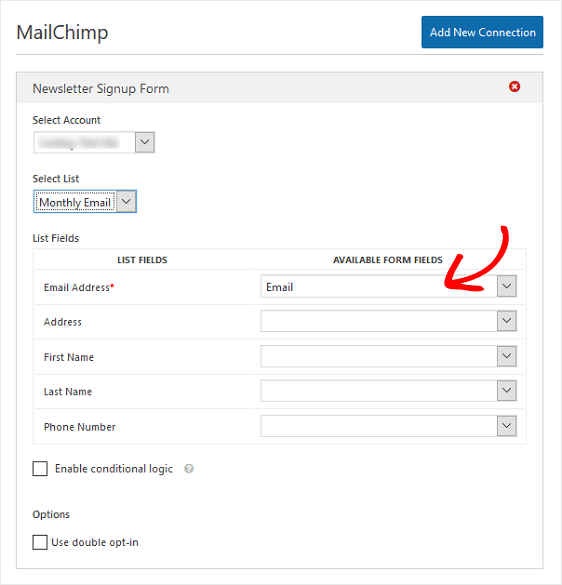
After entering your API Key, you have to make the following configuration. Select your MailChimp Account and pick the email list where you want your subscribers to be added. Now click on the email address dropdown. Next, enable conditional logic and double opt-in option if you want.
Once you’re done with all the configurations, click on the Save button.
4. Configure The Notifications For Your Subscribe Form
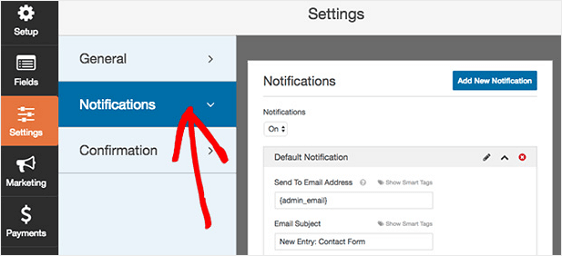
Whenever the subscribe form is submitted, you can send emails by the way of notification. You can send emails to yourself or your team members by adding the email addresses in the Send to the Email Address field.
You can also send form notifications to your visitors for confirming their subscription by using Smart Tags.
5. Configure The Subscription Form Notifications
You can send confirmation to your site visitors to let them know that their forms have been submitted. To serve this purpose, you can choose from three types of confirmations.
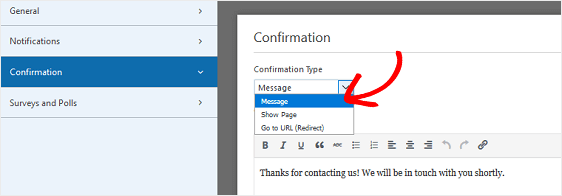
- Message- Messages are the default confirmation types in WPForms. Here, a message is displayed on the visitor’s screen confirming that their form has been processed. You can customize the message to be displayed however you’d like.
- Show Page- Show Page option redirects your visitor to your site once they submit the form. This option is mostly used to redirect your visitors to a Thankyou Page.
- Go To URL (Redirect)– Go To URL option redirects your users to a different website.
6. Add MailChimp Subscribe Form To Your Site
Once you have created a MailChimp subscribe form, You can add it to different locations on your website. You can add the form to your blogs, pages, post, or sidebar widget.
To embed the form to your post/page, create a new post/page and click on the Add Form button. From the drop-down menu, select your subscribe form and click on the Add Form button.
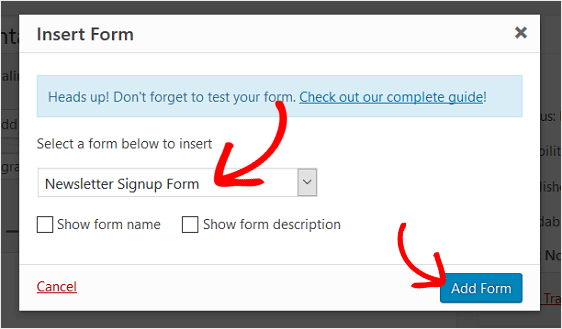
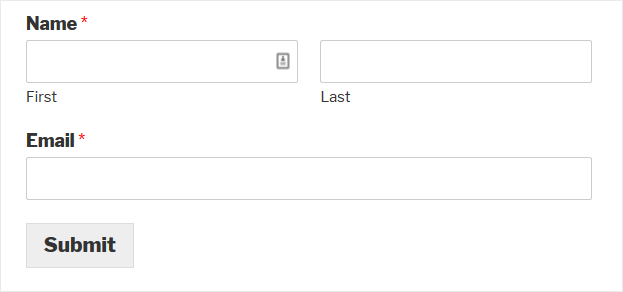
Now, publish your post/page to show your form on your website.
Conclusion
That’s it for this blog. Now, you can easily create a WordPress MailChimp subscription form by following the above-mentioned steps.
MailChimp not only helps you to build your email list but also boost engagement and grow your business.

