Step By Step To Create a File Upload Form in WordPress
You can easily create a file upload form in WordPress so that the visitors can add media and files to the forms available on your website. Using this you can accept resume, Biodata, and other important files extensions.
The file upload fields on your WordPress forms help to collect more information from the users. It also makes the form filling experience of the users positive. This reduces the form abandonment rate. It also makes it easier for the users to add different types of files and media to the form such as a photo in jpeg. format and a signature in doc format.
You may also be interested in Email marketing services, Chat Plugins, and Fomo Plugins
This is a common requirement on forms such as
- Customer Support forms
- Job Application Forms
- Client Services Forms
- Event Registration Forms
- Podcast for audio playback
WordPress limits the default file types that can be uploaded. However, with WPForms plugin uploading any file type can be easily uploaded to your form be it video (.mpg, .mov, and .wmv), Audio (.wav, .mp3, and .mp4), Images (.png, .gif, and .jpg) and documents (.doc, .xls, .ppt, and .pdf).
Great isn’t it!
Free Version WPforms – https://wordpress.org/plugins/wpforms-lite/
Premium Version – WPforms Premium
Steps To Create File Upload Form in WordPress
Step 1 – Create File Upload Contact Form in WordPress
Once you install and activate WPForms plugin, go to WP dashboard and click on WPForms —> Add New at the left hand panel.
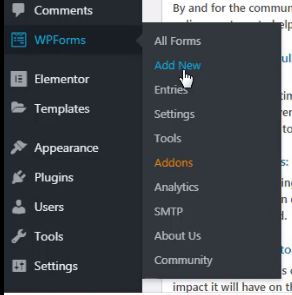
Then Name the Form. Then, go to Additional Templates type “File Upload Form”, and then click on it to open the template. (In order to search for this form you have to activate the activated Form Templates Pack Addon beforehand.)
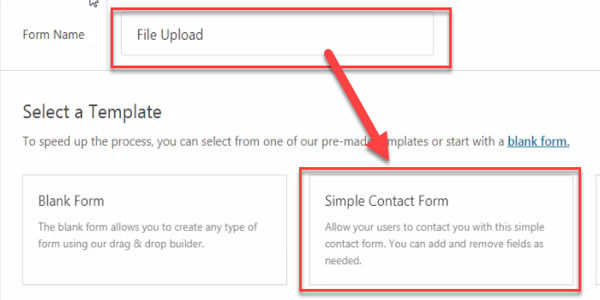
A pre-built File Upload Form will be filled by WPForms and a drag and drop builder will be displayed. Additional fields to your contact form can also be added by dragging them from the left-hand panel.
WPForms also allows you to add the File Upload field to any WordPress form by dragging the File Upload form field, available under Fancy Fields.
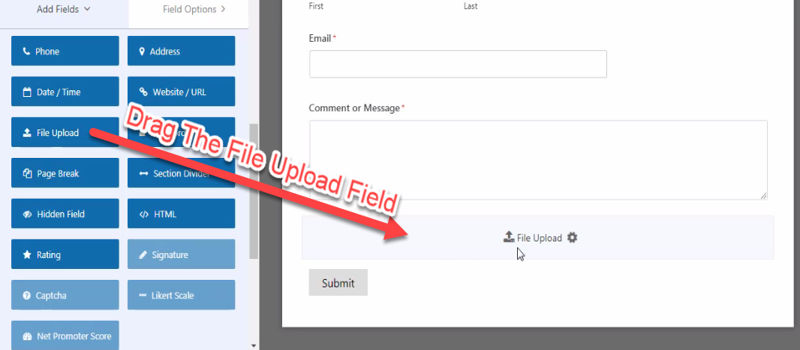
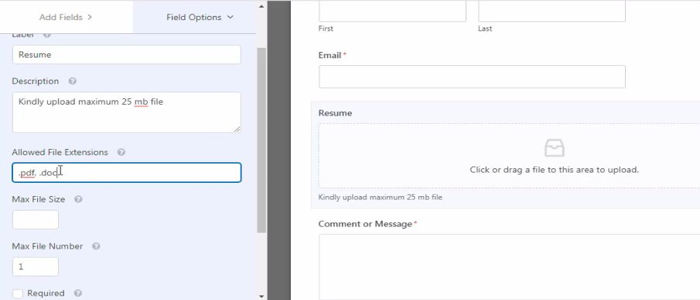
Name, Email, Phone, File Upload, and Additional Comments fields will be already there in the File Upload Form template.
You also have the facility to change Description, Label, Required, Style, Max File Size etc.
Step 2: Switch to Classic File Upload OR Modern Field
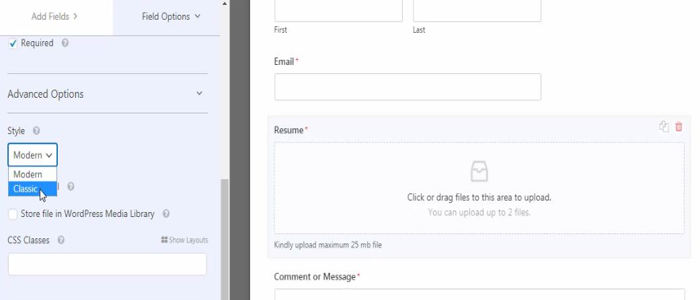
This is not a mandatory step. This step will help you change the style of the file upload from the default Modern style to the Classic style with a ‘Choose Now’ button Or you can leave it to modern.
Go to Advanced Options –>Style and click on the Dropdown to select Classic or you can leave it to classic.
Only one file can be uploaded per field in classic file upload. In Order to accept multiple uploads, you have to add an extra File Upload Field. Enabling conditional logic on the initial File Upload makes it appear clutter-free.
Step 3: Customize File Upload Form Settings
- Go to Settings —-> General
- Configure Form Name, Form Description, Submit Button Text, Spam Prevention, GDPR Enhancements
- Click on Save
Step 4: Configure Your Form’s Notifications
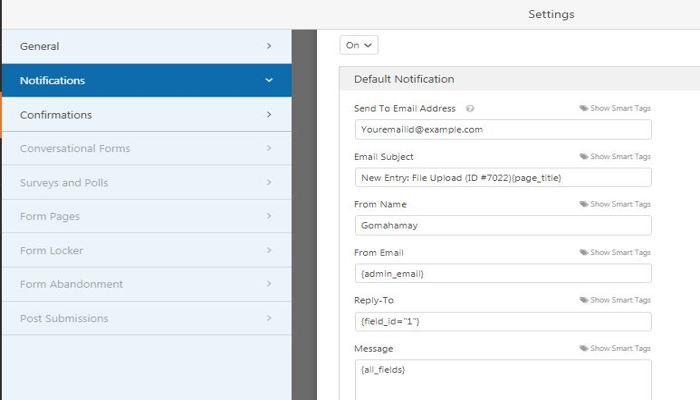
The notification feature notifies you through an email whenever there is a fresh file upload. You can disable/enable this feature whenever you want.
To get the email notification, a form notification in WordPress has to be set up where you have to provide your email address. You can also send a personalized notifications to the users using the smart tags notifying them that you have received the forms.
You can customize the notification emails with your logo or image that will show up in the custom header image area. WPForms send the file uploads via email as links so that the email deliver-ability Will not hurt.
Step 5: Configure Your File Upload Form’s Confirmations
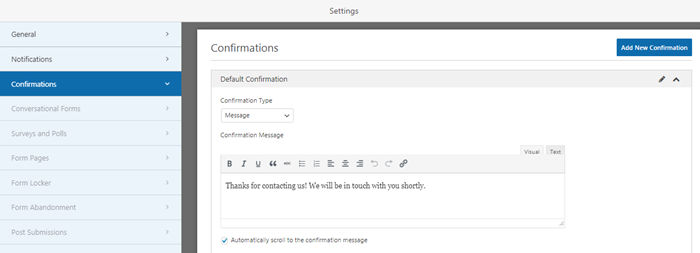
- Go to Settings ——> Click on the Confirmation tab in the Form Editor
- Select the type of confirmation type to be created (Message, Display Page, Redirect)
- Customize the confirmation message
- Click on Save
Step 6: Add Your File Upload Form to Your Website (For Gutenberg editor )
With WPForms you can add your forms to various places on your site such as blog posts, pages, and even sidebar widgets.
- Go to the Update Settings on a post/page.
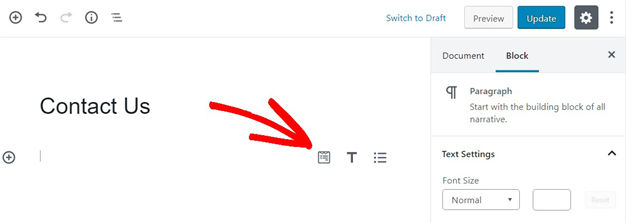
- Click in the First Block
- Then, click on the Add WPForms icon
- WPForms widget appears inside of the block
- Click on the WPForms dropdown
- Pick the form that you want to insert into your page i.e. the file upload form.
- Click on update to publish your form on your site.
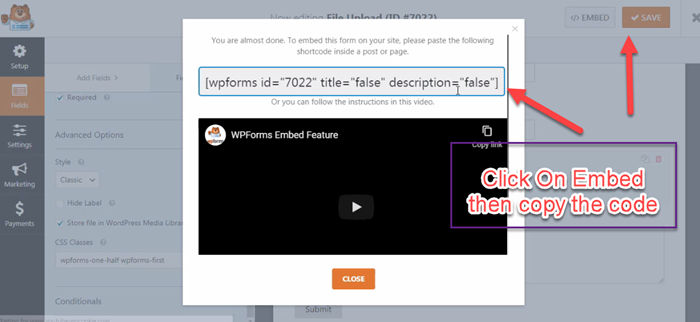
If you are using the normal classic editor of WordPress then simply copy the code and paste it in the Visual editor area.
Step 7: View Your Uploaded Files

Go to WPForms —–> Entries
From the drop-down menu click on View
You can download the file or simply view in the browser.
WordPress form builder plugin is an extremely easy-to-use plugin that can help you create a File Upload Form in WordPress in no time. Try it today!

