How to Create Poll Form For Your WordPress Site
Do you want to create a poll form for your WordPress Site? Polls allow us to vote from multiple-choice questions and we can know the best options. You can allow them to select multiple options or strict it to one option. You can also use it on the eCommerce website for your customer’s favorite product.
Engage with your audience and gain valuable insights about them. It gives you a chance to understand your audience’s preferences and opinions and thus, incorporate them into your operations.
Polls and surveys both help you gain valuable insights about your audience, but there’s a little difference. Surveys are usually designed to obtain in-depth opinions about your audience and can include multiple questions. On the other hand, polls are a quick and simple way to ask questions to your audience where they have to choose from the options you provide them.
In this blog, we will discuss how you can create a WordPress poll form using WPForms. Let’s start.
Steps Involved In Creating A Poll Form For WordPress Site?
WPForms is one of the best survey and poll plugins available. You can easily create a WordPress poll by following the steps:
- Install WPForms And Surveys and Polls Addon
- Create A Poll Specific WPForms
- Advanced Settings
- Enable Poll Results And Create Custom Message
1. Install WPForms And Surveys And Polls Addon
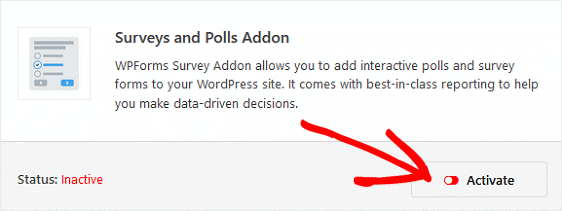
To begin, install and activate the WPForms plugin. Thereafter, you’ve to install Surveys and Polls Addon. Go to WPForms and click on Addons. Search for Surveys and Polls Addon in the search bar and click on the Install Addon button. Then activate the addon and you will see a green color active status on your screen.
2. Create A Poll Specific WPForms
Now, you have to create a new WordPress form. To do this, go to WPForms and click on Add New. Then, you will see a “Select A Template” section. Choose Poll Form Template and move ahead.
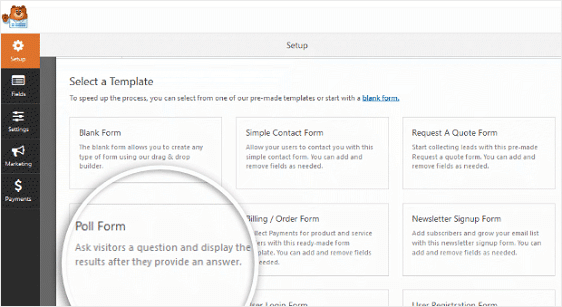
To customize your poll form, go to the Form Editor section and start editing the poll form. In the left-hand panel, you can edit the question that you want to ask your audience and the choices for the answer. Other than the text options, you can also opt for image choice to make your WordPress Poll form visually attractive.
Thereafter, you can either embed the form in your WordPress site or customize the Advanced Settings.
3. Advanced Settings
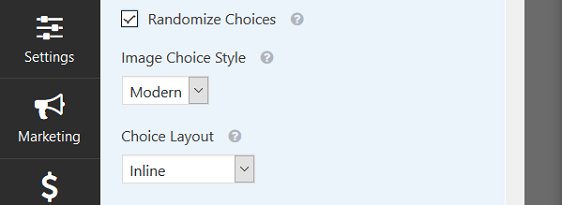
Scrolling down to the bottom of the form editor, you will find some advanced settings which you can customize voluntarily. First, check the box labeled “Randomize Choices”. This will enable you to display your poll answers to your site visitors randomly.
If you have enabled the image choices in your poll form, you can select your image style i.e. Modern, Classic, or None, from the Image Choice Style section. Lastly, you can choose the layout for your choices i.e. Inline, One Column, Two Columns, or Three Columns. To do this, go to the Choice Layout section, and select the desired option from the dropdown.
Now, you’re all done with the customizations.
4. Enable Poll Results And Create Custom Message
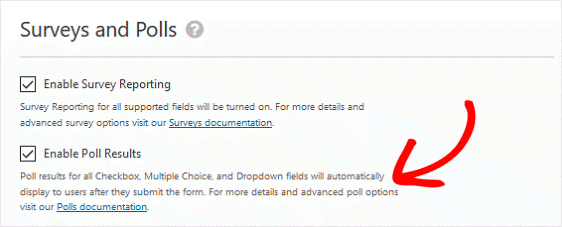
If you want to display your poll results to your audience, go to Settings, click on “Surveys and Polls” and then check the box labeled ” Enable Poll Results”.
If you want to display a custom message to the visitors when they submit your poll form, navigate to settings and go to the Confirmation section. Here, you can customize your message according to your choice. For example, you can write, Thank you for voting.
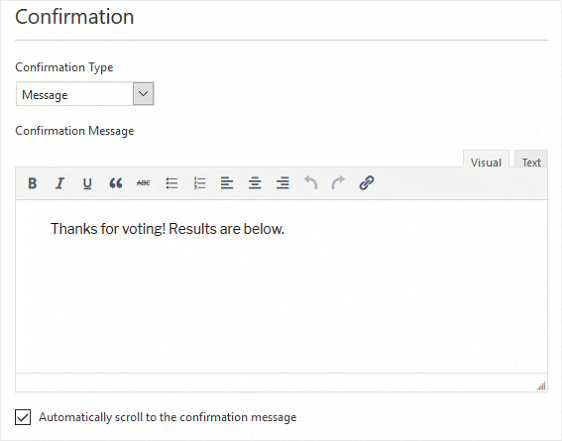
Make sure that you save the settings once you’re done. Now, you can embed the WordPress poll form on your site and you’re all set to go.


