How to Create a Simple Contact Form in WordPress 2023 (Step by Step)
In this article, we will be learning about how we can add contact forms to our WordPress website. There are many contact form plugins but none of them is as much fast as WPforms. So let’s take a small step-by-step tutorial for it.
![]()
You may also be interested in FOMO Plugins and Best contact form Plugin
The Challenge
Yes, it is possible to create WordPress Contact Form within 5 minutes. Isn’t it great news for the beginners! And, definitely for those who believe that “Time is Money”. The WPForms Challenge is all about doing it yourself in less than 5 minutes in 5 simple steps.
The process is quite simple and user-centric, and trust us the Challenge is not mere claim but a reality.
Let’s Get Started
Once you install WPForms, the WPForms menu appears on the left. Simply click on the WPForms. For new installations, the challenge pops on the bottom left corner of the page and it comprises the steps as stated below:-
- Name Your Form
- Select a Template
- Add Fields to Your Form
- Check Notification Settings
- Embed in Contact Us Page
Press the Start Challenge button when you are ready.
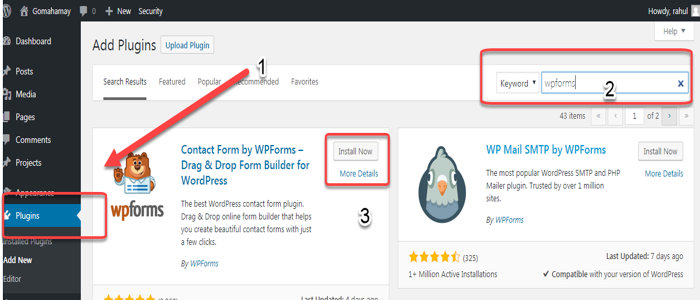
1 . Hover Over plugins then click on the search box and enter the name ” WPForms ” then You will get the first options wpforms plugins then click on install and activation.
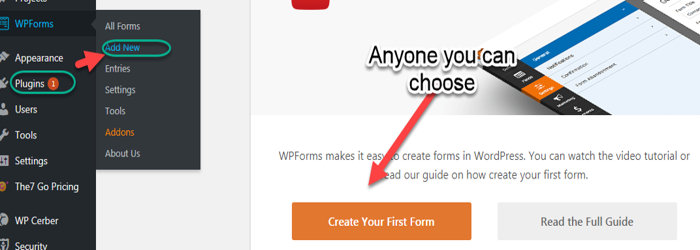
2. After activation click on you can click over add forms or click on create your first form
Setup Guide
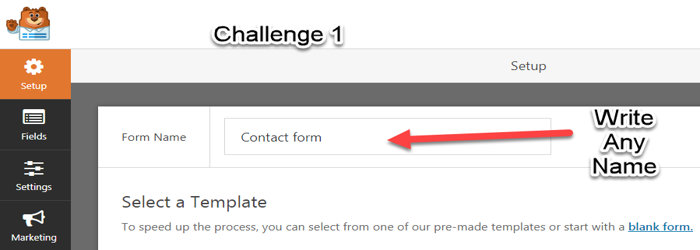
1. Name Your Form
The form builder opens for you as soon as you click on the Start Challenge button which prompts you to input a name for your form. You can also later decide whether to showcase the form name or not. But, if you opt to display the form name, it would be easier for you to identify it in the admin area. Also, it is a personalization option for you. Once you have added the form name, click on the Done button on the guide box.
2. Select a Template
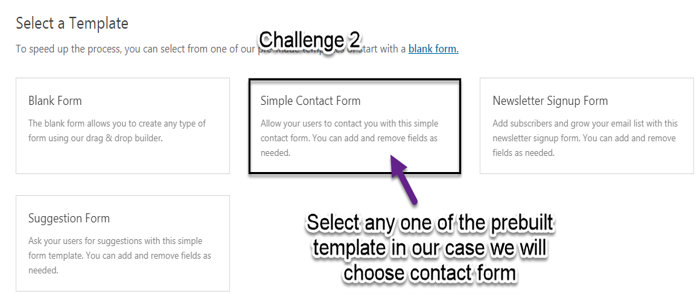
Template selection is the next step which is a time savior. Simply choose the template you want to go with and click on Proceed. If you do not want to opt for any of the pre-built templates, you can create your form right from scratch by clicking on blank forms.
3. Add Fields to Your Form
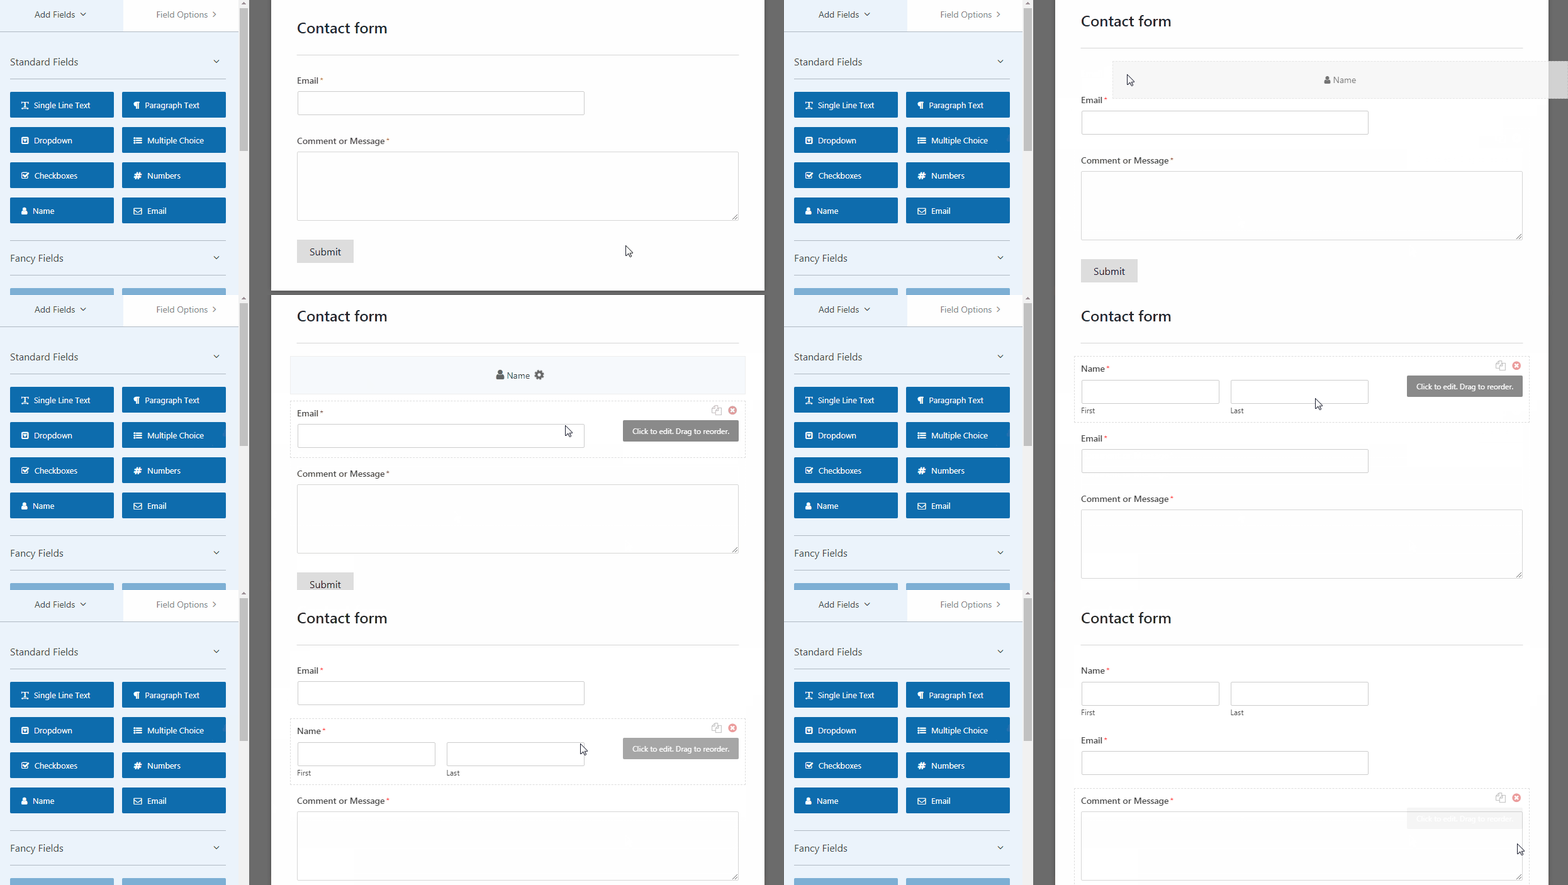
The drag and drop form builder will appear once the template selection is complete. The template form fields are extremely user-friendly as they offer a seamless start and quite often already comprise the fields that you may require. Besides, the field options are highly customizable and you can add, delete, remove, rename or do other edits as well. Field addition is a simple drag-and-drop – Just choose, drag and drop! When you have done the necessary designing, then click on Done and proceed to the next step.
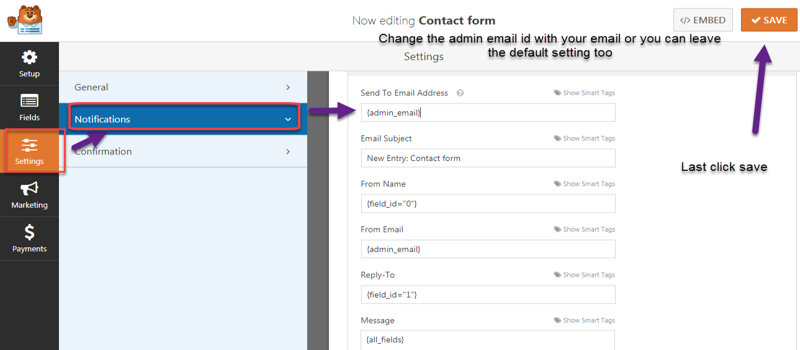
4. Check Notification Settings
The next step that follows is to create the notification emails. The purpose of the notification emails is to keep the site admin alert about any new form entry. The default setting are well placed and notify the site owner about each new form entry, However, you can double-check on the settings via the notification email setup tutorial. To finalize this step click on the Done button.
5. Embed in a Page
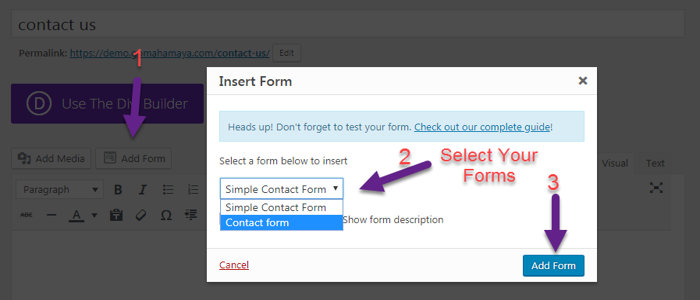
Last but not the least, you have to insert the form on a page. A new page will appear which can be named as per your choice. Then click on the Add Form button at the top of the page. An overlay button appears that allows you to choose the form you would like to embed on the page. You will be given the option to select the Title and description. Once you have finalized your selection, click on Add Form button.
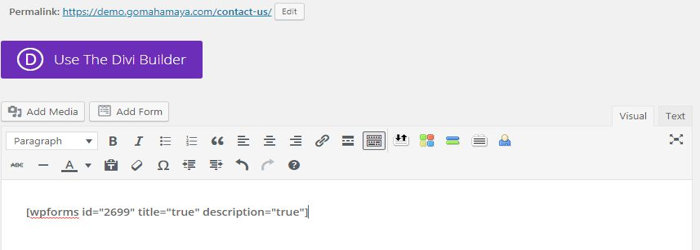
A shortcode gets auto-generated and placed on the page. Click on the Done button and you are through the challenge.
Don’t be surprised, because it is as simple as this. Hope you have enjoyed the tutorial and would take up the challenge to create your own Contact Form in no time. Keep the timer on!
Conclusion – Feeling satisfied with the lite version of WPforms. Why don’t you upgrade It to the pro version Which has prebuilt templates? Need Coupon Try the official website For getting the coupon.

