How To Create Before After Image Slider In WordPress
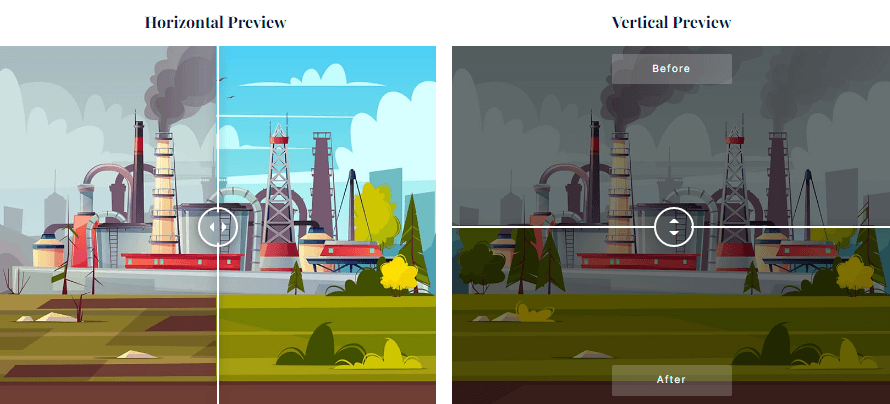
Before After Image Slider in WordPress can be created With the Drag and drop option. You can create horizontal and vertical Before and after photo sliders. For this tutorial, we are going to use the BEAF plugin. This plugin provides an easy, innovative and simple way to compare two images in a single frame. Also, this plugin allows its user to manually scroll and check the difference. Before After is a perfect tool for comparison purposes and is being used widely.
This tool can also be used to showcase transformation stages. For example, designers can use this tool to show off the difference between a previous house and renovated house. There are many other uses like someone can use this tool to showcase their own personal body transformation or a hairstylist can use this to show off their work by using the Before After feature. Also, a clothing brand can use this tool as well to present colour variations of their same product easily. Many times I have even seen densities, Or many doctors, Professionals use these image comparison sliders. For this reason, this tool has been widely chosen by professionals and even beginners. Its ease of use makes it more favourable.
Steps To Create Before And After Photo Slider In WordPress
Let’s understand this step by step-
- Firstly after logging in to the WordPress dashboard, go to PLUGINS and search for Ultimate Before After Image Slider & Gallery in the search bar menu. Then, you INSTALL and ACTIVATE our Before After WordPress plugin.

- After that go to before after slider setting two add a new one, where you will find two options namely- method 1(using 2 images) and method 2 (using 1 image).
- Method 1 option will let you choose two images for comparison. on the other hand in
- Method 2 option you can use a single image to show before-after transition. As method 2 option is available for only pro version users. so here, I will explain only method 1(which is using 2 images).
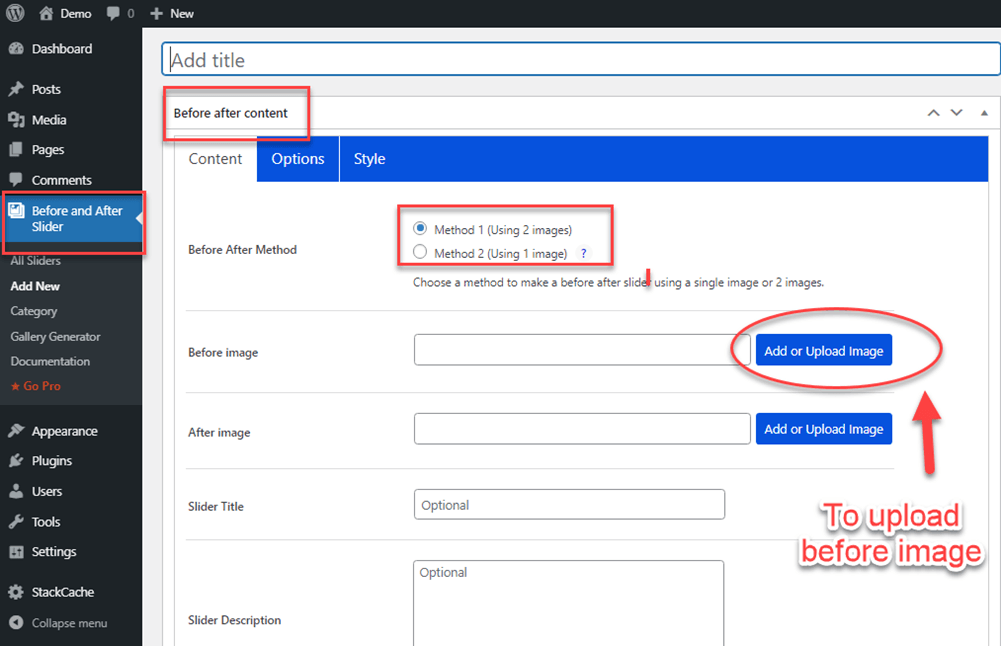
- Now, to add before image click on the UPLOAD IMAGE option and select an image from the wordpress media library, and upload your image. Similarly, you can add after images from WordPress media.
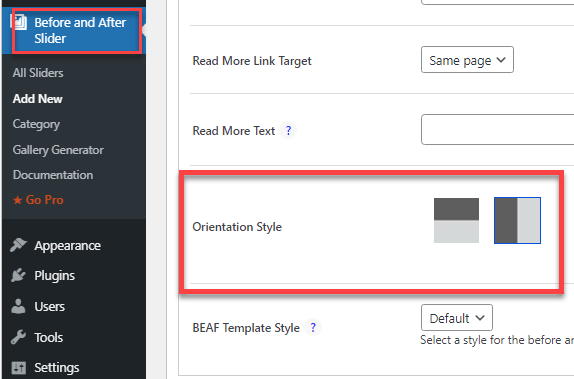
- Now, in WordPress, you will find options like add title, description box, links where you can add information related to your content. Though these are optional and can be avoided. Apart from these, there are also orientation style options available in WordPress. orientation style is used to make your image either horizontal or vertical.

- In the options tab, you will find more options like label change(where one can change the label to sunrise-sunset, summer-spring, day-night, etc.) and many other options that you can only avail as a pro version user.
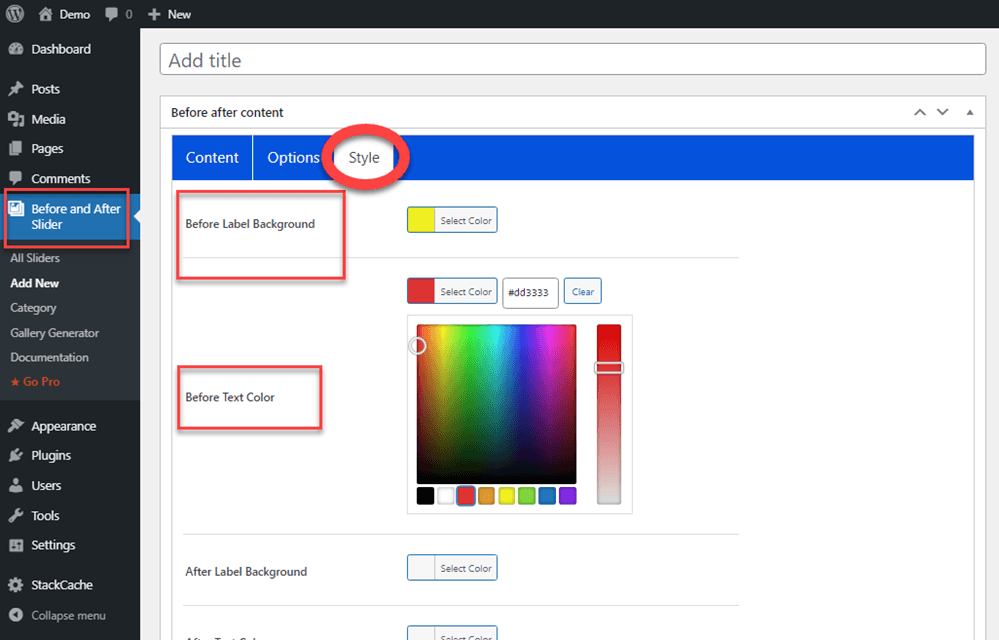
- In addition to the options tab, there’s a style tab as well which will let you change the before-after label background and also allow you to add title, description, links to your image.
- Now, when you need to post your image on the desired page. Then, you have to copy the shortcode generated in the right corner of your screen. From there you simply copy-paste the code to the desired location using your page builder plugin or Gutenberg plugin.

- And that’s it about the addition of the before adder slider in WordPress.
CONCLUSION
As promised, the WordPress Before After Plugin is extremely effective and easy to use. It can also boost your conversion rate. It hasn’t been long when we had morphology, image resizes and image blurring features in our hands. Now we have the Before After image slider feature. You can use a product comparison image slider to create stunning content for a website.
In this article, we explained to you about Before And After slider plugin and also steps to create before after in WordPress step by step.
You might be interested in Reading Website Speed Optimization Best Practices, Email Marketing Services and landing page plugins

