How To Add Additional Variation Images for WooCommerce
Do you want to add multiple images for one product? In WooCommerce, you can easily add additional variation images gallery for Products using bright Plugins. However, adding multiple images can give your users a better glimpse of the products and help them choose in a better way.
Thus, it gives your users an amazing experience and, therefore, Boost Your conversions.
Why Should You Choose multiple images for one product?
If you have an eCommerce business, you should disclose every piece of information to your users. Having more than one image for a product makes it easier for the users to choose and buy the products.
Although WooCommerce allows you to add just one image per product variation, you can use the Additional Variation Images for the WooCommerce plugin to add multiple images.
- You provide a better glimpse of the products to your customers.
- You can add multiple images per variation to your products.
- It enables you to showcase varieties in colours, shapes, sizes and all.
- You can show the zoomed images of the products for better insights.
- It gives your customer a message that you’re selling transparently.
- Steps To Installation and Setup of additional Variation Images for WooCommerce
You also obviously need a previously installed WooCommerce plugin. After that, follow the given steps:
You can also read my blog About email marketing services and Live chat Plugins.
1. Install and Activate the Additional Variation Images for the WooCommerce plugin
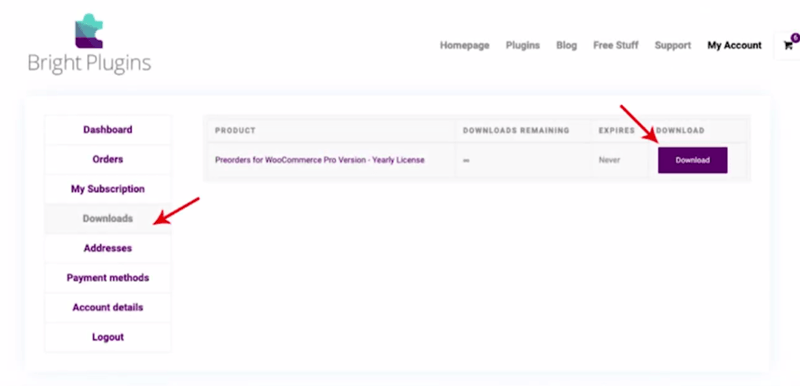
To begin with, go to the Bright Plugins Dashboard and download a Zip file of the plugin.
Note – To install and use, you need to ensure that you have PHP version 5.6 or higher and WordPress 5.0.
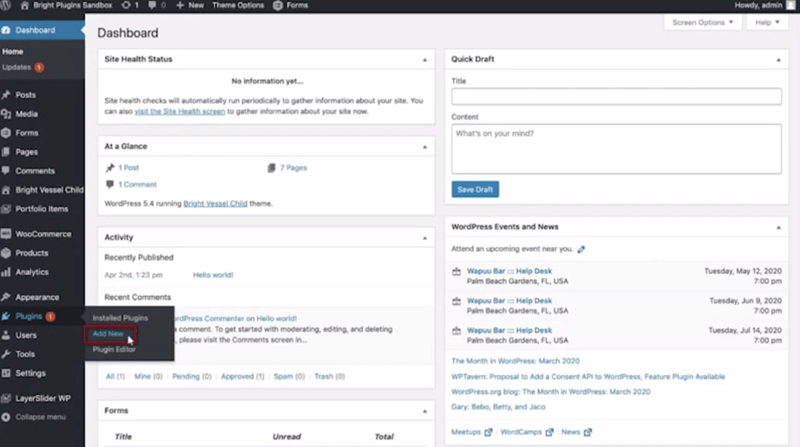
After that, go to your WordPress admin dashboard and navigate to Plugins. After that, click on Add New. and
Then, click on the Upload Plugin button. Then click the Choose file button and upload the plugin’s Zip File from your computer.
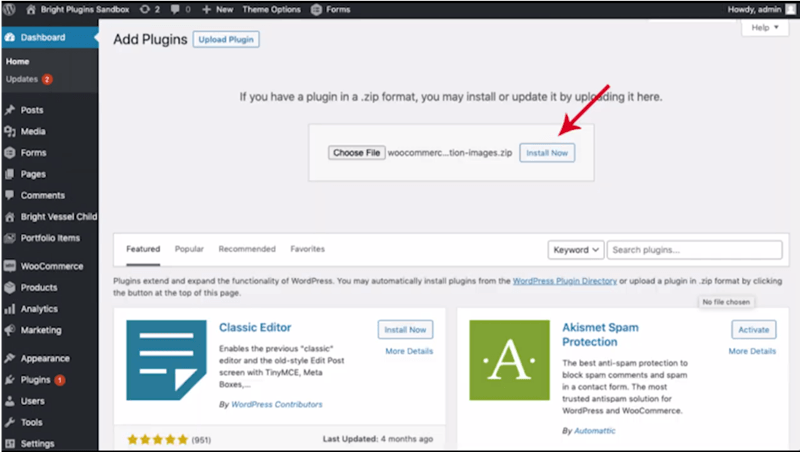
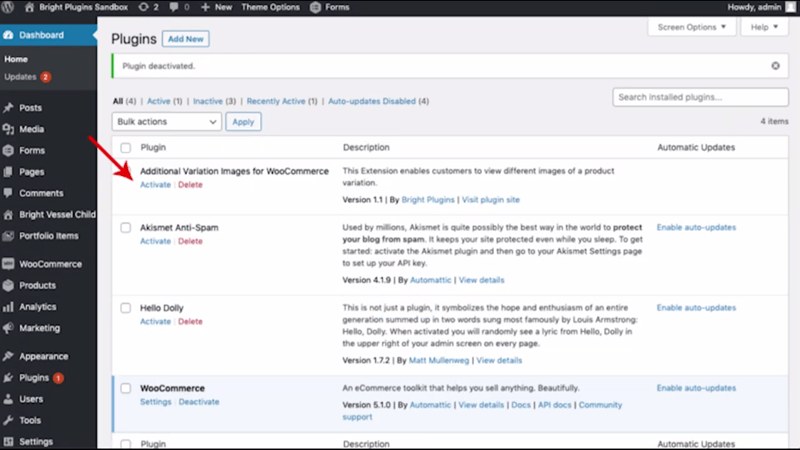
Once uploaded, click on the Install Now button. After that, go to the Plugins section and activate the plugin by clicking on the activate button.
2. Using Variation Images for the WooCommerce plugin
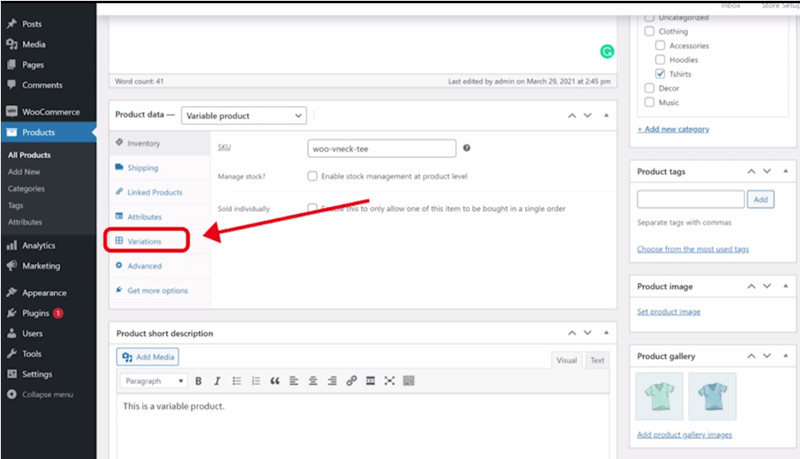
Using the WooCommerce Additional Variation Images plugin is quite simple. Go to your WordPress dashboard, navigate to WooCommerce and go to Products. Then, click on All products, and you’ll see a Product Data section.
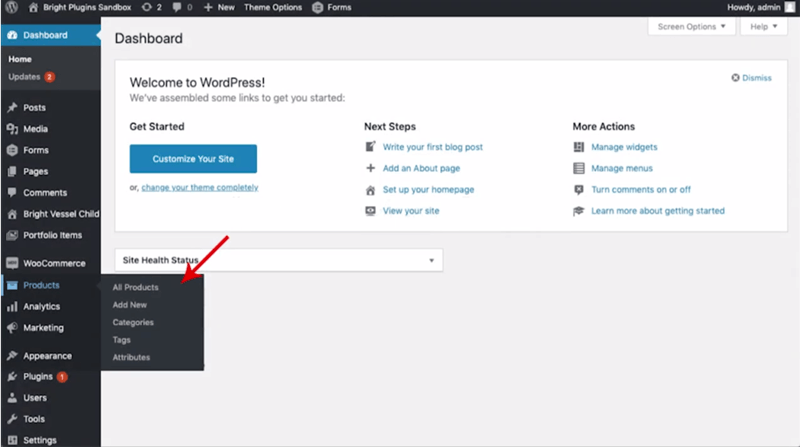
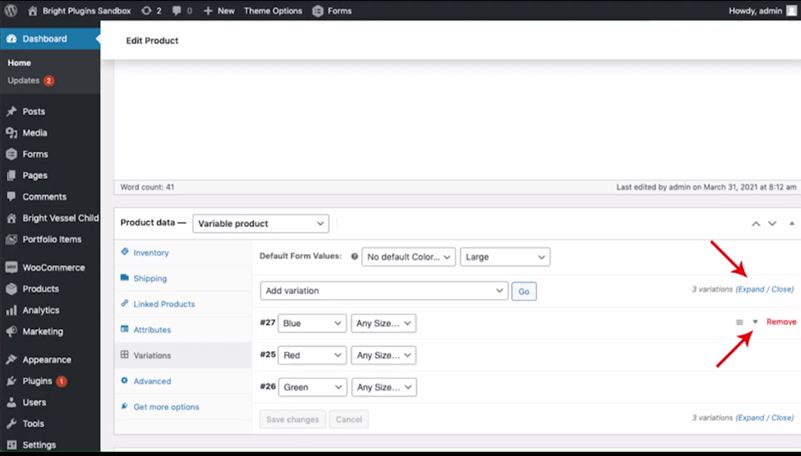
In this section, go to the Variations tab and choose how many variations you want to add your images to.
Then, you’ll be redirected to the Edit Products section, where you can add the images by clicking on the Add Images button.
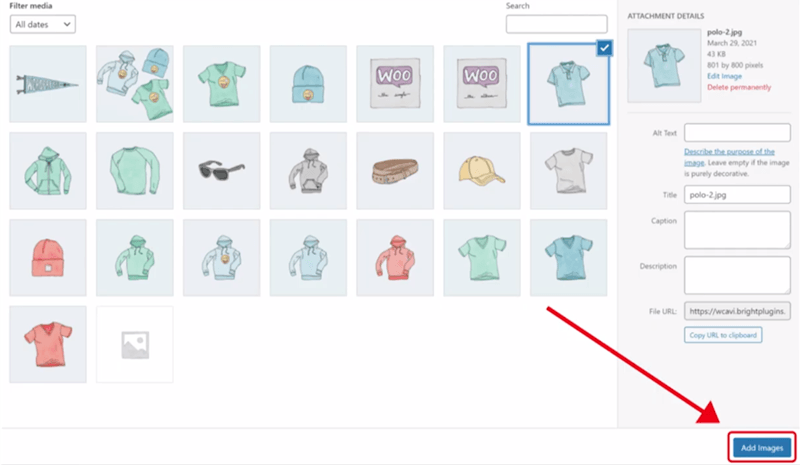
Then, select as many images as you want to add. After adding the images, you can see them next to the various products you selected as “Additional Images“. Drag the image in case you want to reorder the sequence.
Once done, go to the top right of the Products Page and click on the Update button to save the changes. This is it, and you’re all set to go.
Conclusion
That’s it for the tutorial on how to add woocommerce variation images to your store. Now, you have understood how to add multiple images to your products using the Additional Variation for WooCommerce plugin. If you have any queries or suggestions, feel free to leave them in the comments section below.
You might be interested in reading the product filter plugin, Upsell and Cross-sell plugin, and Fake sale notification Plugin.



Awesome